
 September 26, 2016
If you have been thinking of moving to the latest version of SonarQube and you’ve been using the new Active Directory plugin unfortunately it is not compatible with this release, you can see reference to the issue here. The StyleCop plugin for C# which I referenced in an earlier post has been deprecated.
I will be using the LDAP 2.0 plugin and you will see the properties I used to configure it with active directory in my test environment. An LDAP browser is your friend and can help you configure some of the properties.
You’ll also notice that SonarQube defaults to running on port 9000 and some of you might want to run it on port 80. To do this easily and integrate with IIS you can install Application Request Routing 3.0 using Web Platform Installer from this page, I recommend using WPI to install ARR with its dependent components (URL Rewrite, Web Farm Framework, and External Cache Framework).
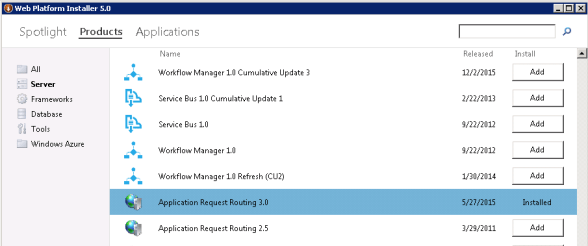
Application Request Routing
After you’ve installed ARR 3.0 you can create a new site in IIS on port 80 with a binding for your friendly URL.

Application Request Routing
Enable Proxy support in ARR
- Launch IIS Manager and click the server node in the tree view.
- Double click the Application Request Routing Cache icon in the IIS section
- Select the Server Proxy Settings… task in the Actions panel make sure that Enable Proxy checkbox is marked.
- Save the contents shown below into a web.config and copy to the root folder of your site
- Don’t for get to change the URLs in the example below to match your environment
NOTE: in the configuration below the SonarQube server is running on Port 9000
<?xml version=”1.0″ encoding=”UTF-8″?>
<configuration>
<system.webServer>
<rewrite>
<rules>
<rule name=”ReverseProxyInboundRule1″ stopProcessing=”true”>
<match url=”(.*)” />
<action type=”Rewrite” url=”http://tfs02:9000/{R:1}” />
<serverVariables>
<set name=”HTTP_ACCEPT_ENCODING” value=”” />
</serverVariables>
</rule>
</rules>
<outboundRules>
<rule name=”ReverseProxyOutboundRule1″ preCondition=”ResponseIsHtml1″>
<match filterByTags=”A, Area, Base, Form, Frame, Head, IFrame, Img, Input, Link, Script” pattern=”^http(s)?://tfs02:9000/(.*)” />
<action type=”Rewrite” value=”http{R:1}://sonarqube.domain.local/{R:2}” />
</rule>
<preConditions>
<preCondition name=”ResponseIsHtml1″>
<add input=”{RESPONSE_CONTENT_TYPE}” pattern=”^text/html” />
</preCondition>
</preConditions>
</outboundRules>
</rewrite>
</system.webServer>
</configuration>
You will also need to add HTTP_ACCEPT_ENCODING to the allowed server variables for everything to work properly, otherwise an error will be thrown.
Allowed Server Variables
- Launch IIS Manager and click the server node in the tree view
- Double click the URL Rewrite icon in the IIS section
- On the right hand side in the Actions pane under the Manage Server Variables heading click View Server Variables…
- On the right hand side in the Actions pane click Add…
- In the Add Server Variable dialog enter HTTP_SERVER_ENCODING and click OK

Allowed Server Variables
To get SonarQube up and running quickly for this post I just used the embedded database (you’ll see the warning in some of the screenshots) and installed the following plugins:
- C#
- JavaScript
- LDAP
- TFVC

SonarQube 6.0 Update Center
You’ll note that I’m logged in as domain user tfsSetup by using the LDAP plugin configured for both Users and Groups. Here is the section I used to specify the configuration for my Active Directory in sonar.properties.

SonarQube LDAP Configuration
NOTE: The groups will not be added automatically to SonarQube you will have to login and create them. You can also assign the permissions to the groups at this point also. In the example below I have created two (2) groups (TFS Admins, TFS Developers) that already exist in active directory in Sonar and assigned SonarQube permissions to them using the Global Permissions

Global Permissions
The TFVC plugin requires some configuration as well, navigate to the following section in the Administration page Configuration | General Settings | SCM | TFVC you can enter the URL value for your TFS Project Collection and click Save TFVC Settings
NOTE: Failing to perform the above step will give you the following error “ERROR: Unable to TFS annotate the following file which is not in a mapped TFS workspace” on every file during the Finish the analysis task.

TFVC Settings
In your TFS Team Project make sure you configure a Generic Endpoint for your SonarQube server. This Endpoint will be selected in the SonarQube task.

SonarQube Generic Endpoint
The server running the build agent where the build tasks for SonarQube execute will require the java runtime be installed. NOTE: You may need to restart the build agent to pick up the new capabilities (java) required by the SonarQube tasks if you install the java runtime after configuring the agent.

Agent Capabilities
Here is a screenshot of the SonarQube build tasks added to a Build Definition

Fetch the Quality Profile
You should be good to trigger a build and start the Analysis of your C# projects. If you don’t want certain files analyzed you can specify these at a global level or project level. Here is a screenshot from the “global” level where I exclude AssemblyInfo.* and the generated *.Designer.cs files.

Configure the files that should be completely ignored by the analysis
Hope this helps your adoption of SonarQube! Don’t forget SonarLint which provides a completely integrated solution for developers using Visual Studio 2015.
If you have any feedback regarding the post or something is not clear feel free to leave a comment.

Trackbacks/Pingbacks
[…] a través de SonarQube 6.0 integration with TFS15 RC behind ARR 3.0 — Team Services, Team Foundation Server and… […]
LikeLike