
 January 6, 2021
If you’re using Azure DevOps Service and its backed by Azure AD, then chances are good you also have a subscription to Microsoft 365. You can integrate Azure DevOps work items into your work search results using a Microsoft Graph connector.
The Azure DevOps connector is currently in preview and is one (1) of ten (10) Graph Connectors developed by Microsoft. Here is the current list in case you want to check out the others.
- Azure Data Lake Storage Gen2
- Azure DevOps
- Azure SQL
- Enterprise websites
- MediaWiki
- Microsoft SQL Server
- File share
- Oracle (preview)
- Salesforce (preview)
- ServiceNow
You can add this connector for your Microsoft 365 tenant if you’re a Microsoft 365 Administrator. The connector requires you register an app in Azure DevOps so that Microsoft Search can access the organization or projects you specify. The assumption here is the Microsoft 365 Administrator is already a member of the Project Collection Administrators group, not to be confused with the Azure DevOps Administrator Azure AD role which grants no Azure DevOps specific permissions.
You can view your apps here under Applications and services. For example here is how my app registration appears ready for my connector configuration.
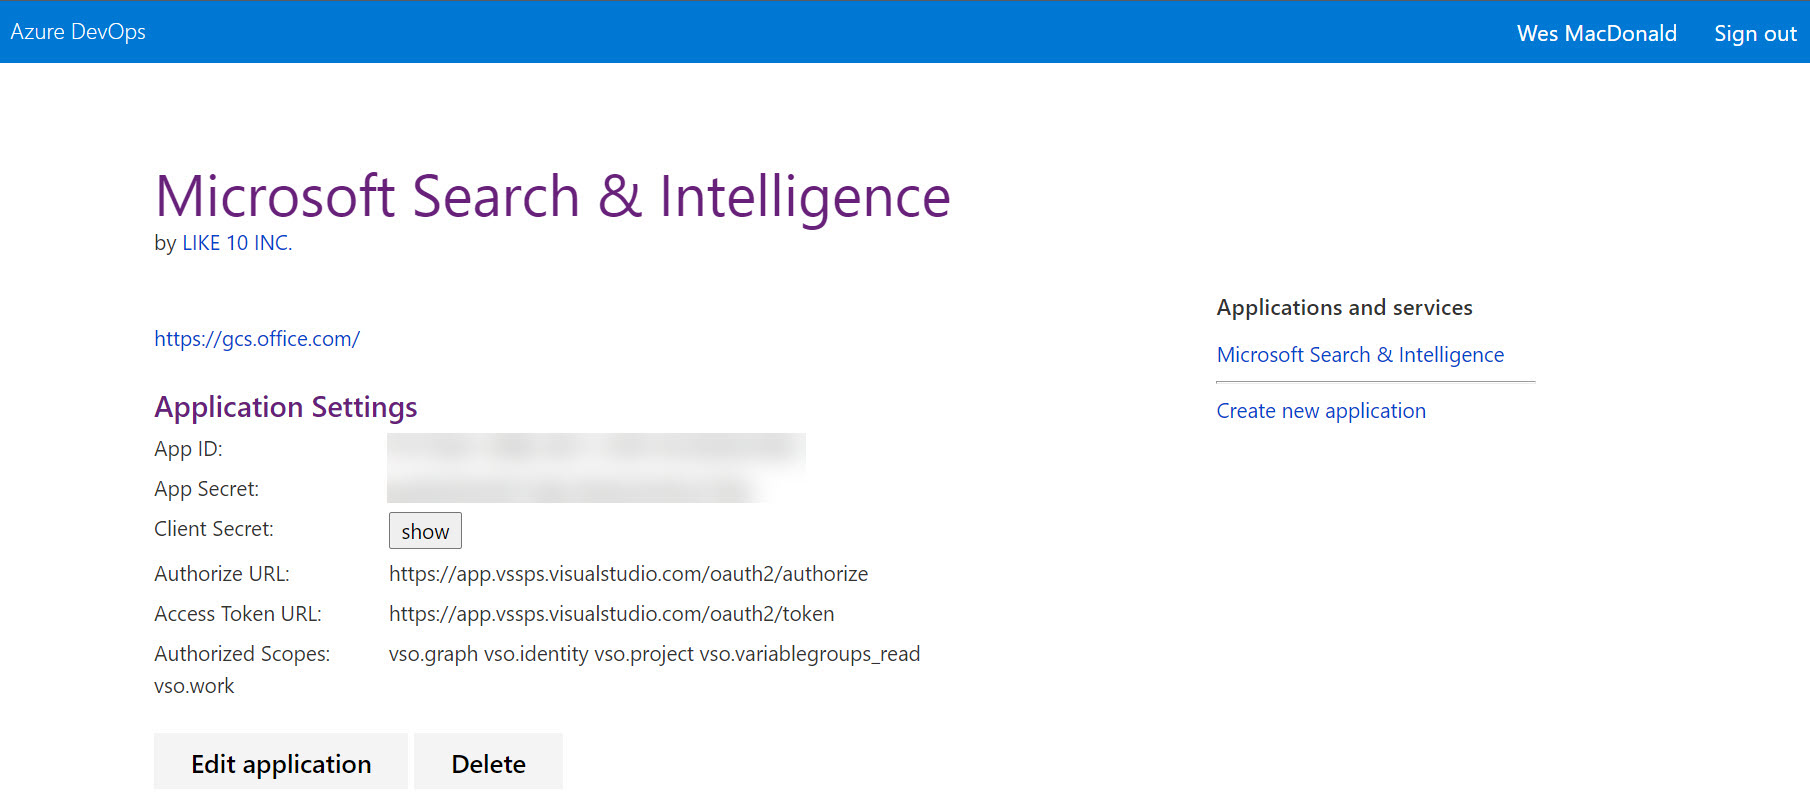
The values you require for the connector configuration are App ID & Client Secret.
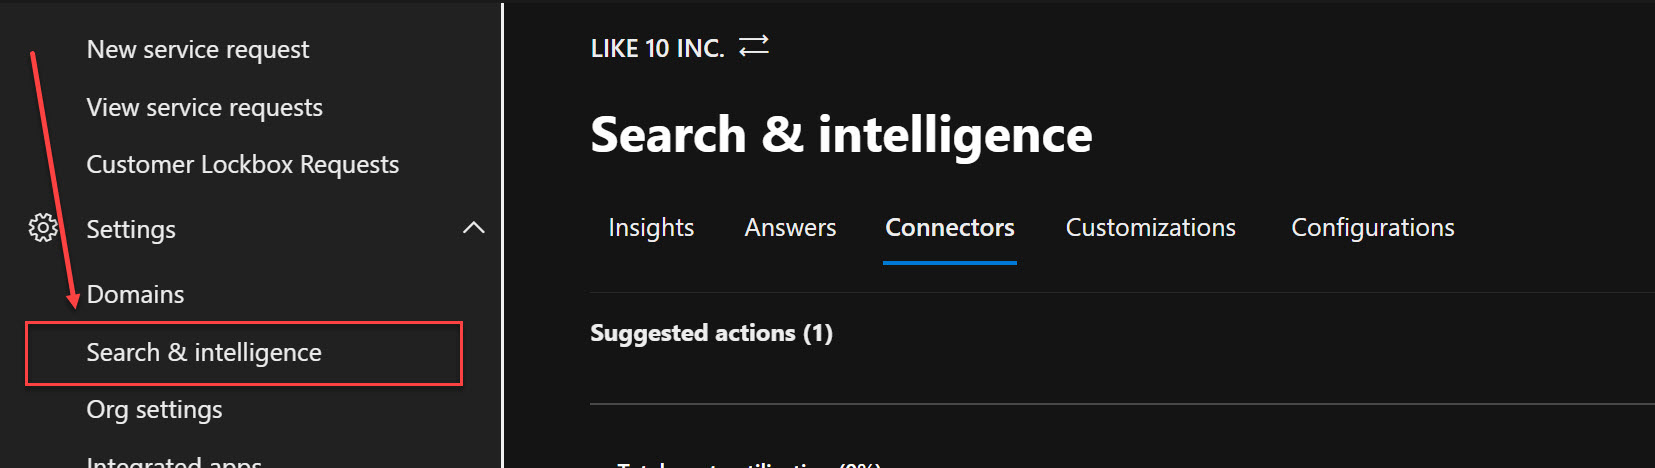
You can access the Search & Intelligence Connectors from within the Microsoft 365 admin center. The Search & Intelligence menu may not be visible in the navigation by default, you can click Show more to display the Settings menu if it is not visible.
On the Connectors tab click Add and choose the Azure DevOps data source

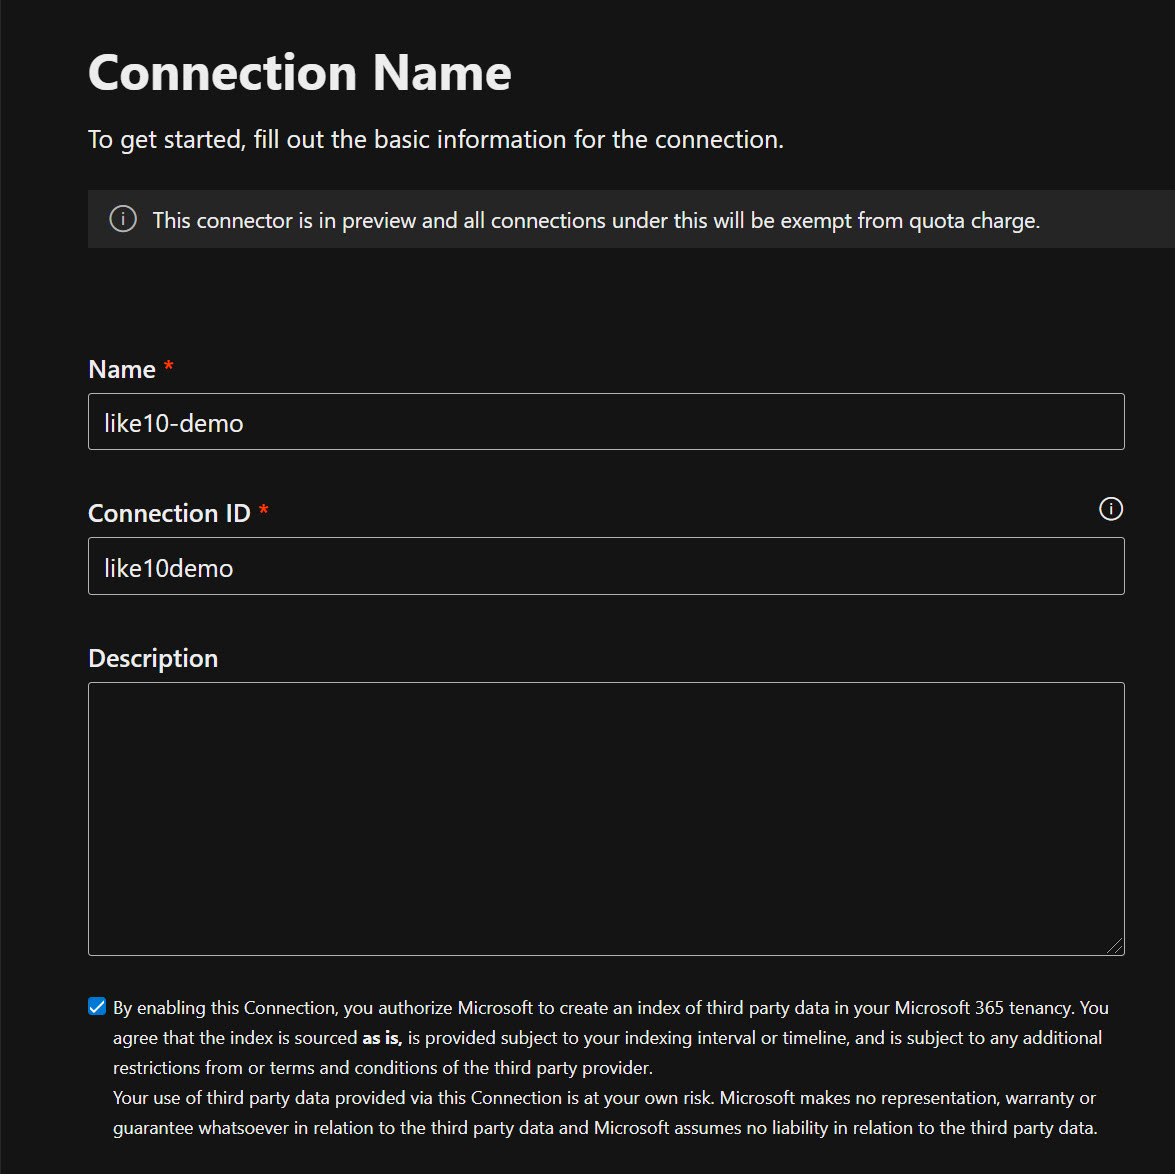
Give the Azure DevOps Connector a name and connection ID and then click Next, on the Connection settings page enter the name of your Azure DevOps organization (https://dev.azure.com/<organization-name>/)
Paste in your App ID & Client secret and click Sign In, if everything is configured correctly you will receive a Connection successful message below the Client secret.

The next step you are able to choose whether you want to index specific team projects or the entire organization (all team projects).
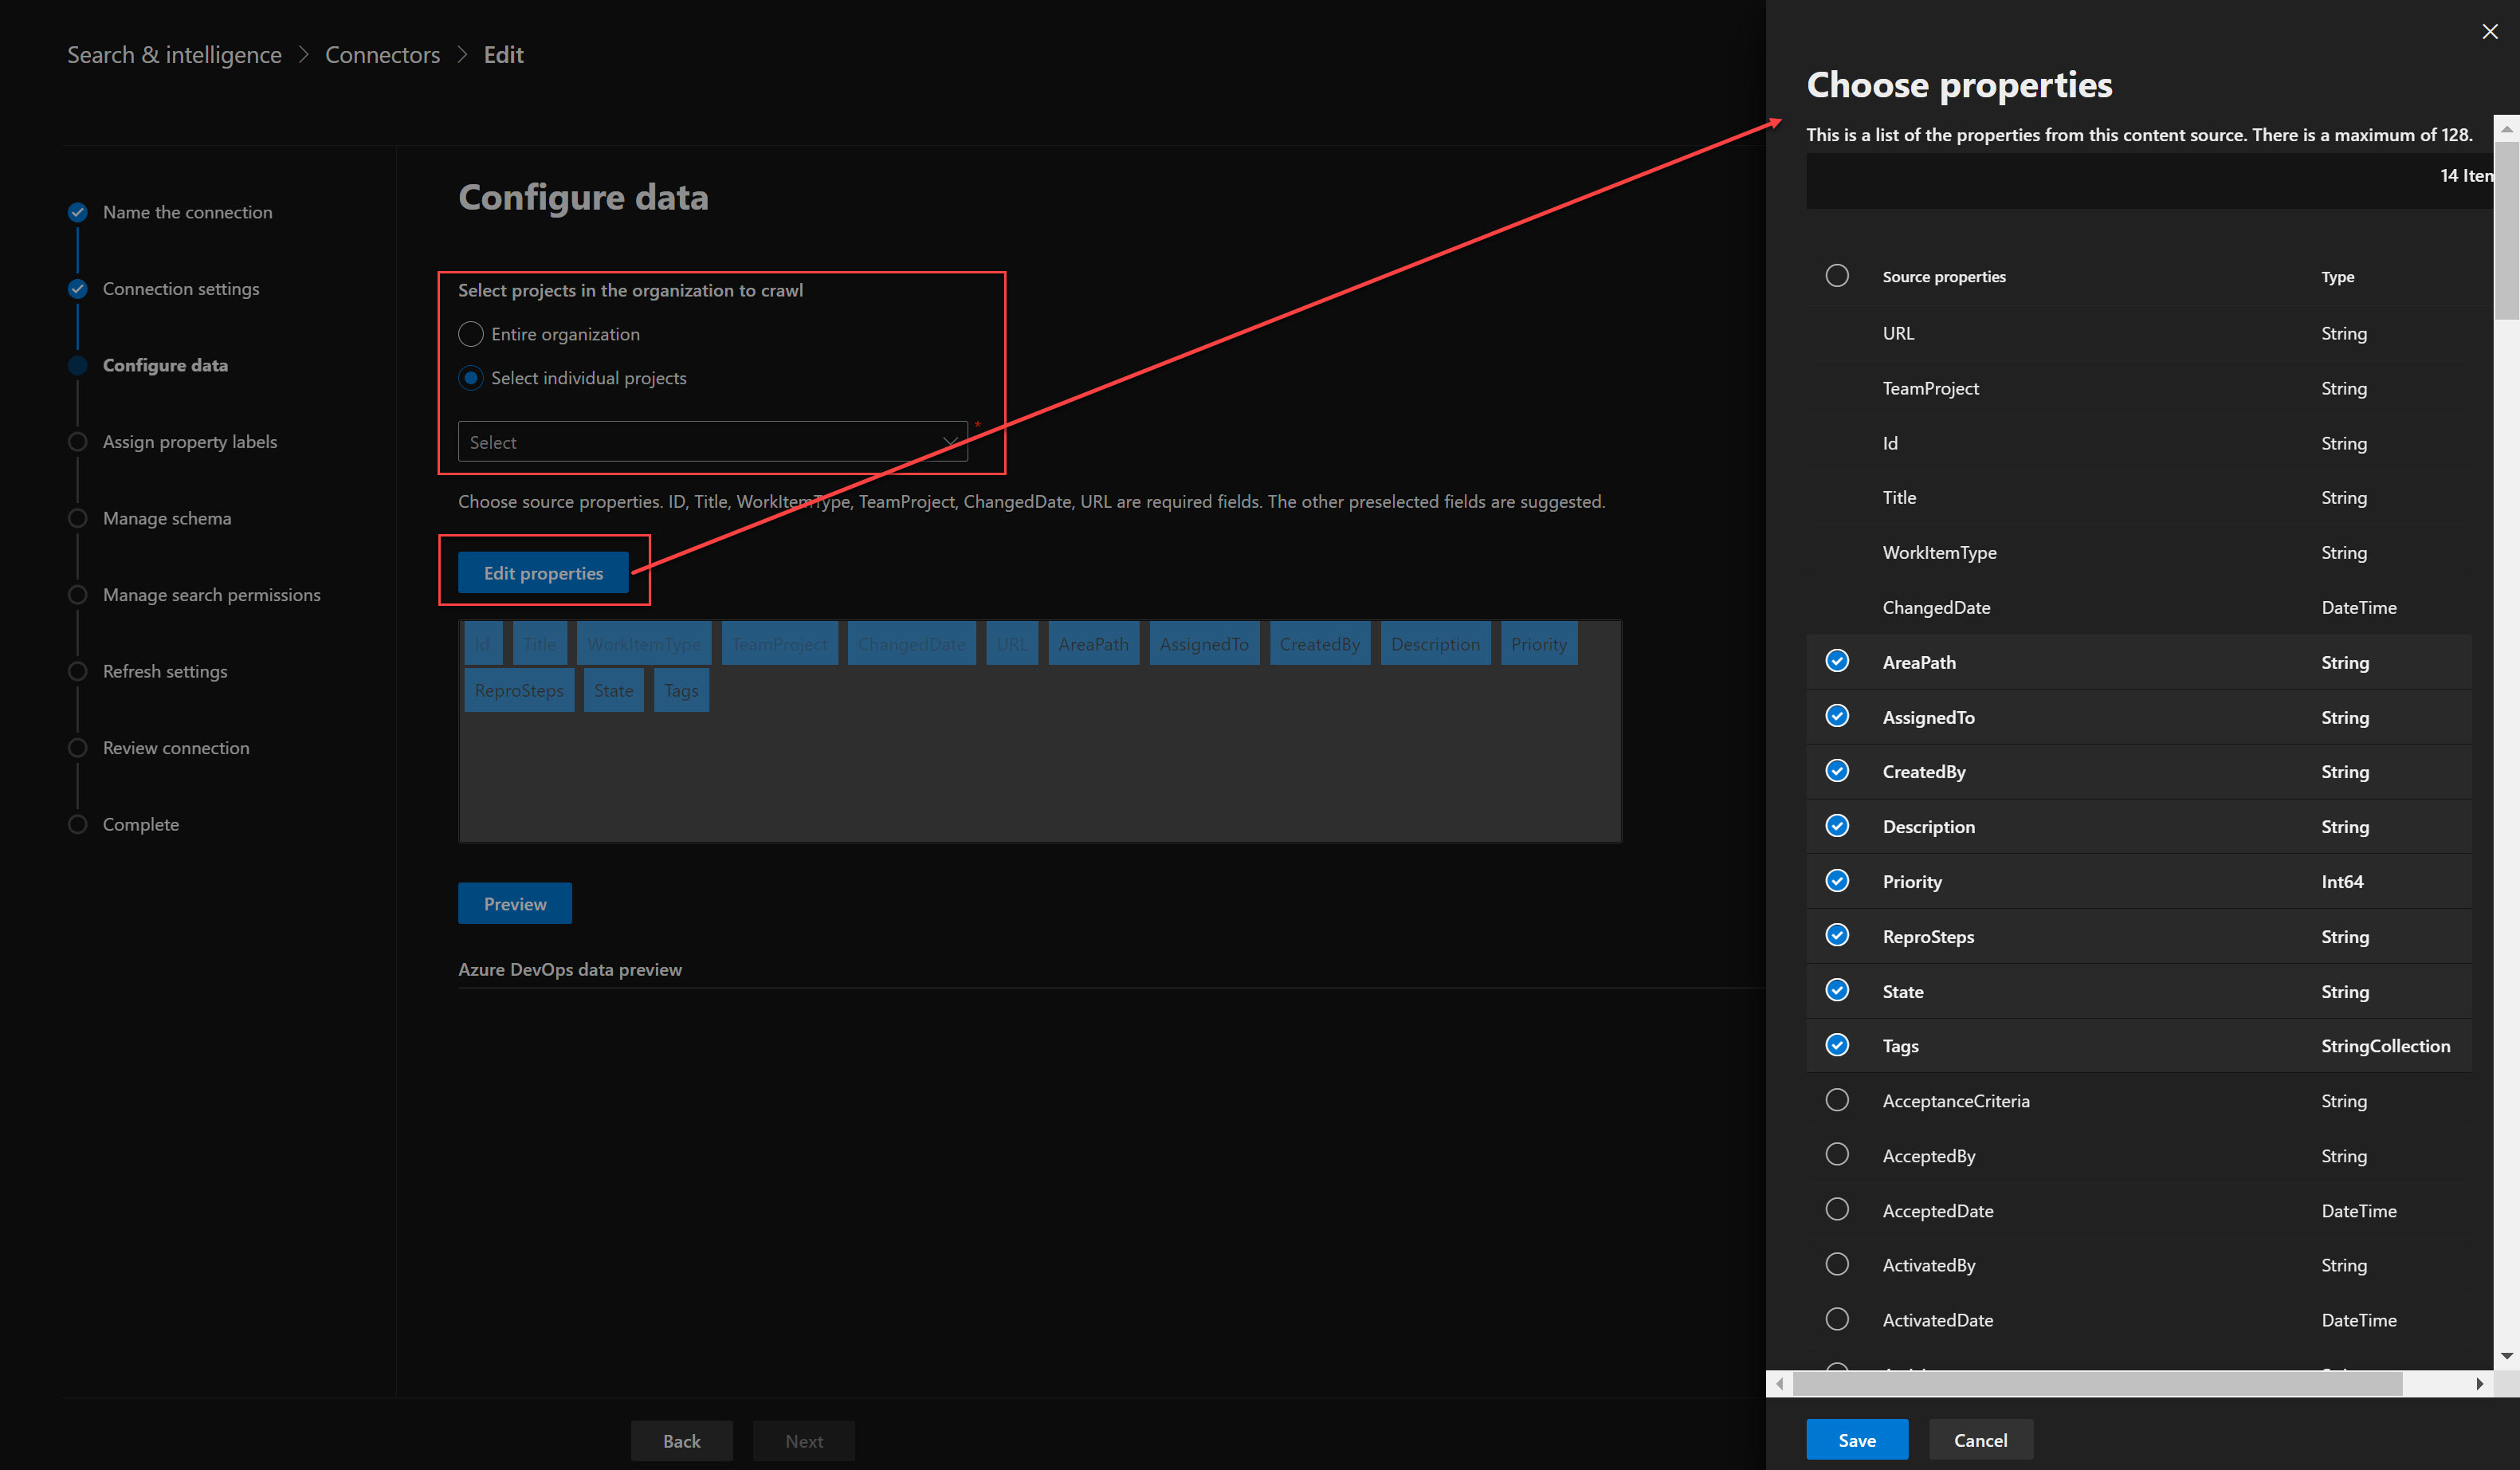
The properties ID, Title, WorkItemType, TeamProject, ChangedDate, URL are required fields. The other preselected fields shown below are suggested. If you click Edit properties you can select from other fields present in your Work Item Types, by default fourteen (14) fields are selected.
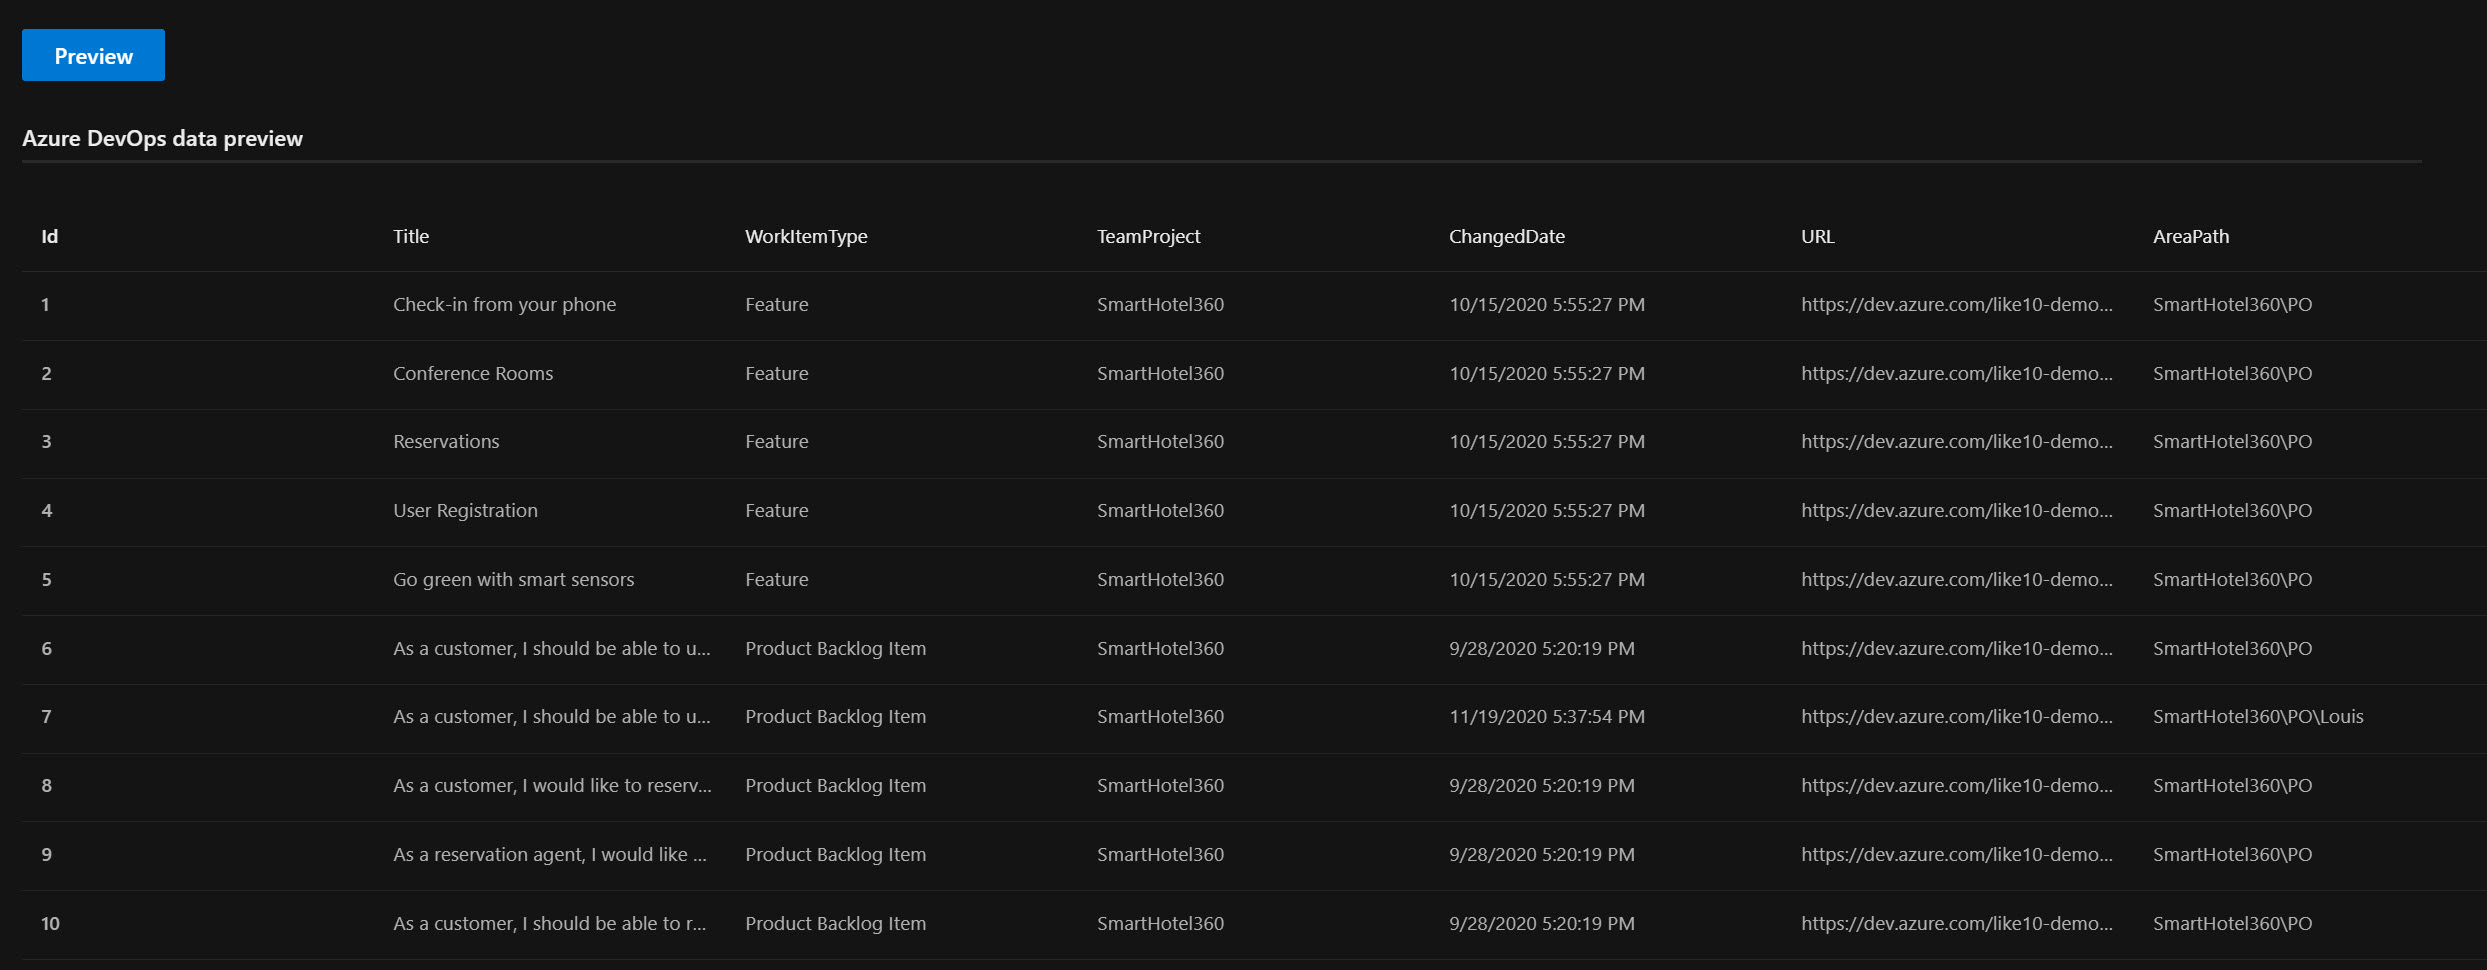
Once you are done selecting the fields you’d like for indexing, you can click Preview to see the data that will be indexed by the connector.
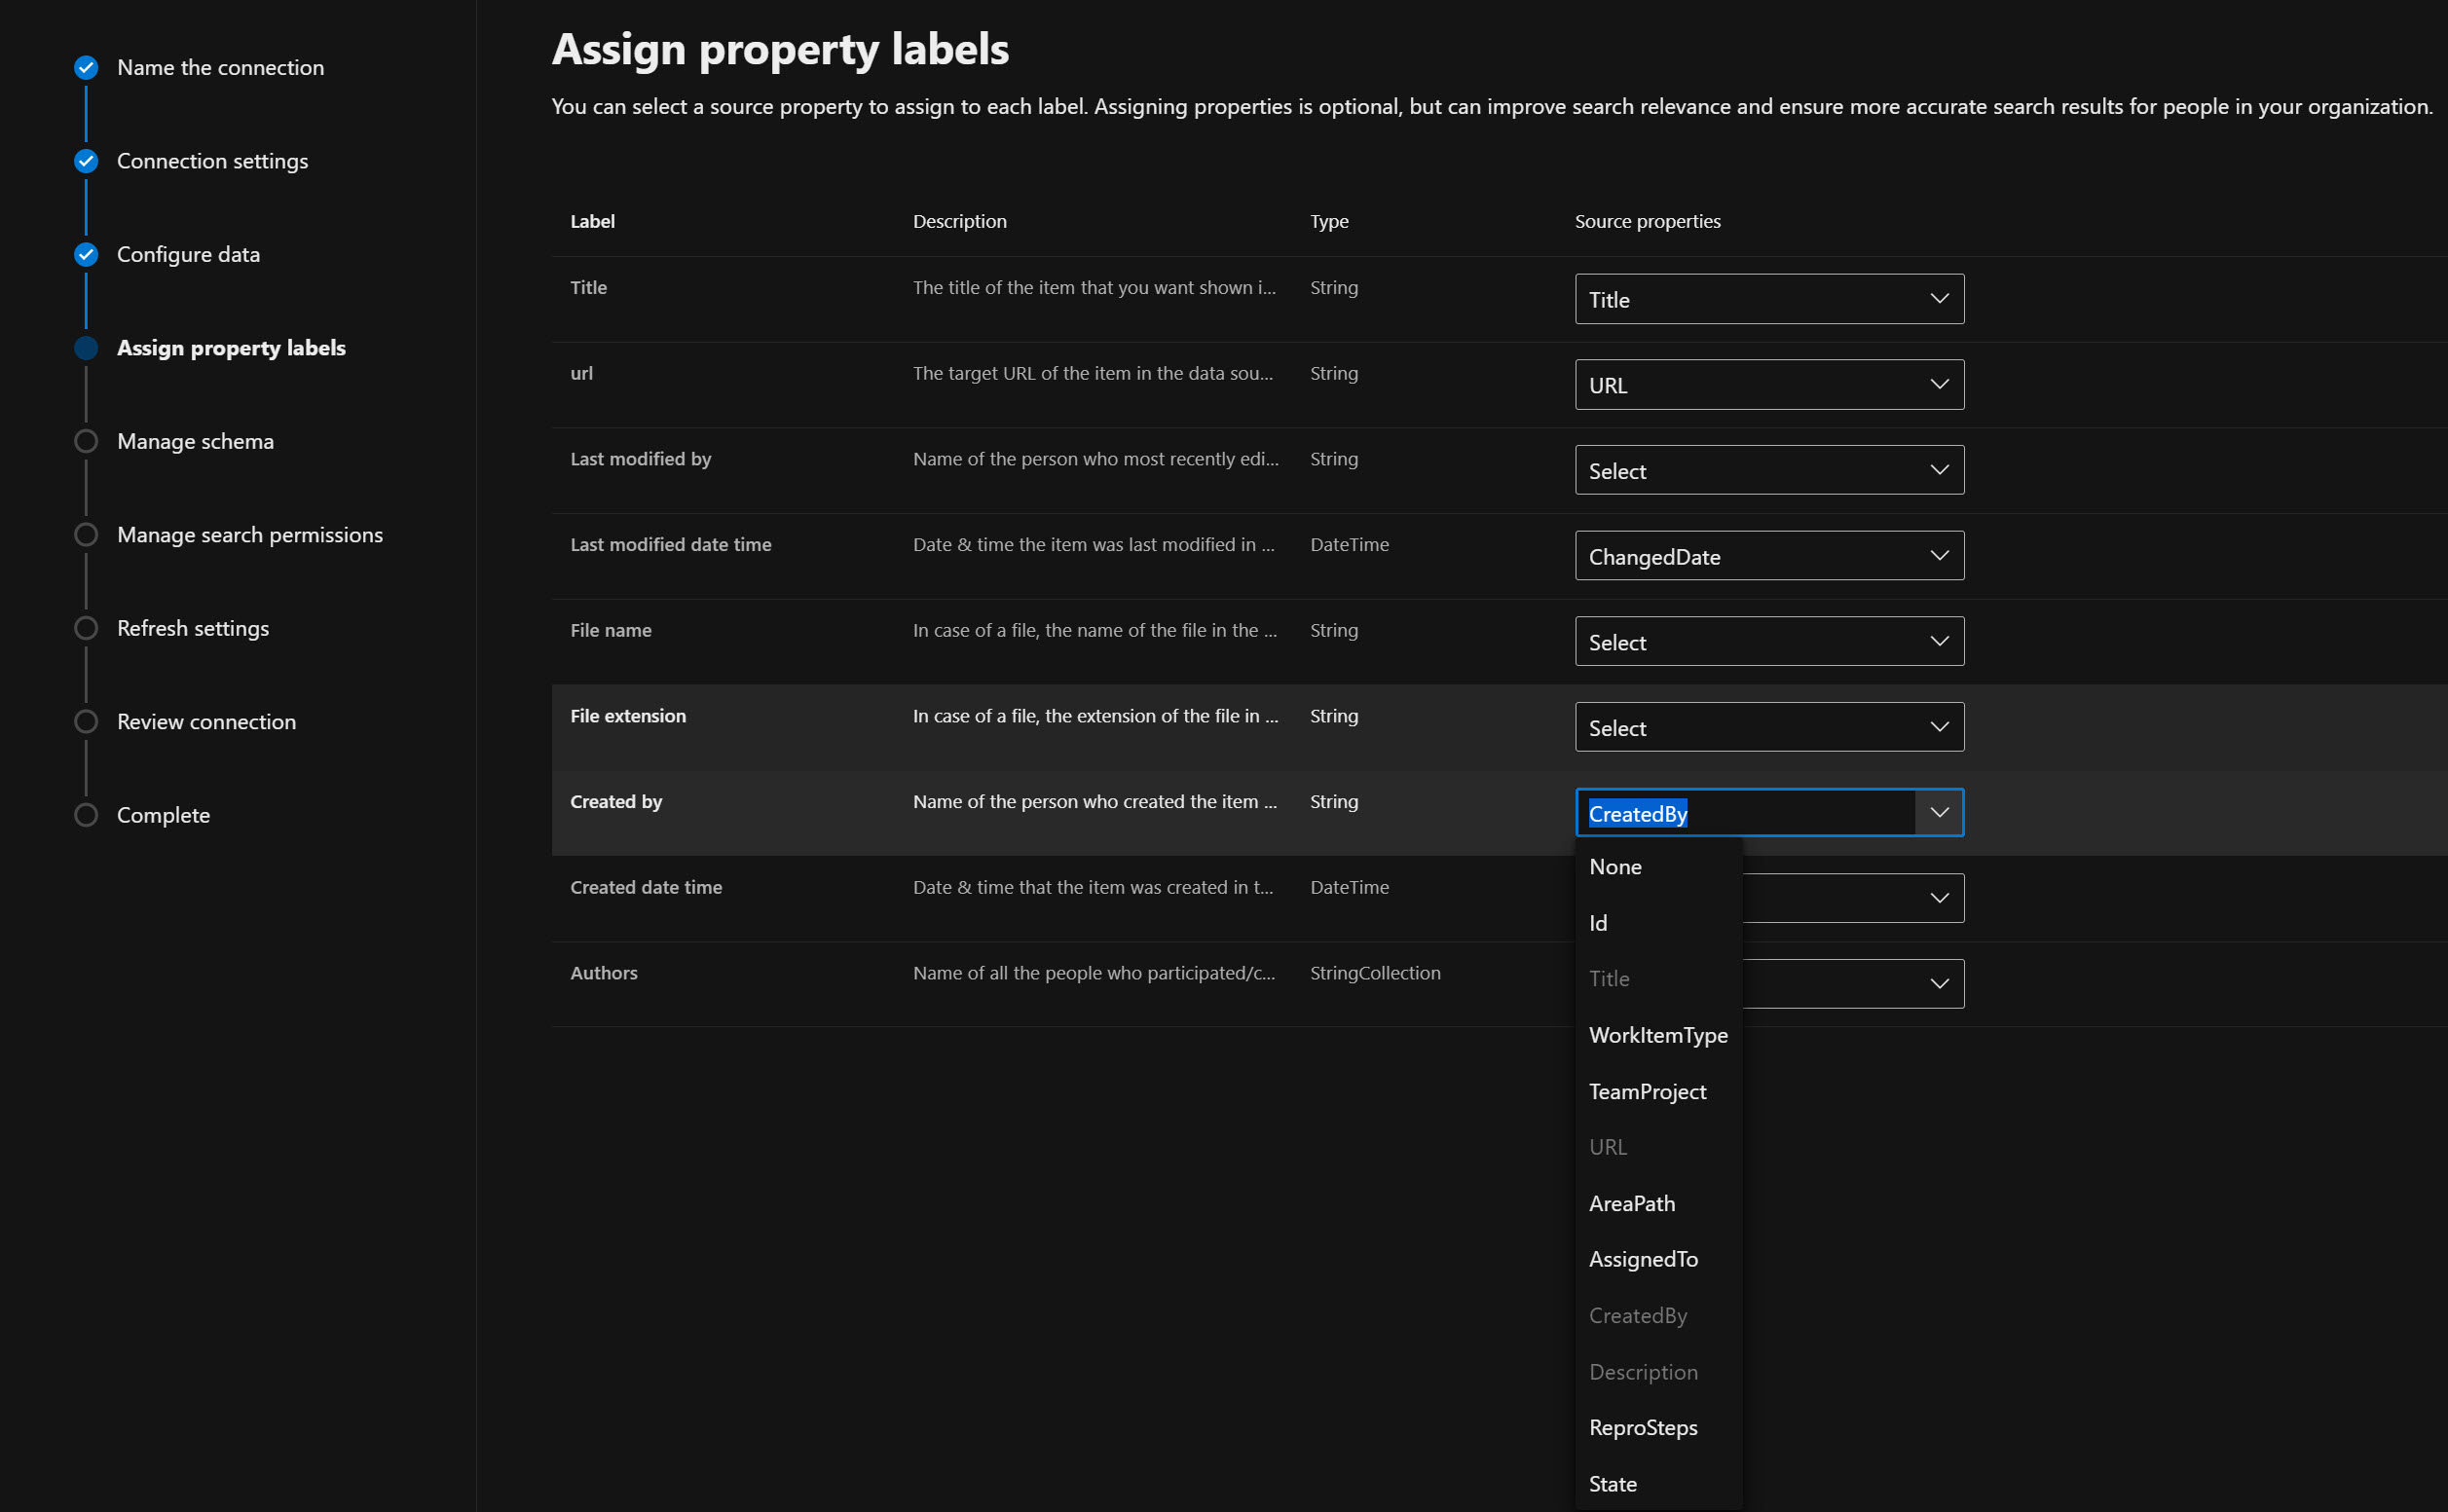
The next step in the process is to assign property labels, the ones that match to a source property are already populated for you.
The next step is Manage schema, each source property must have at least one of the following checkboxes selected: Query, Search, Retrieve. The Content Property defaults to Description which makes sense, however you can change this if desired. It is used to generate result snippets and descriptions in the search results that are returned.
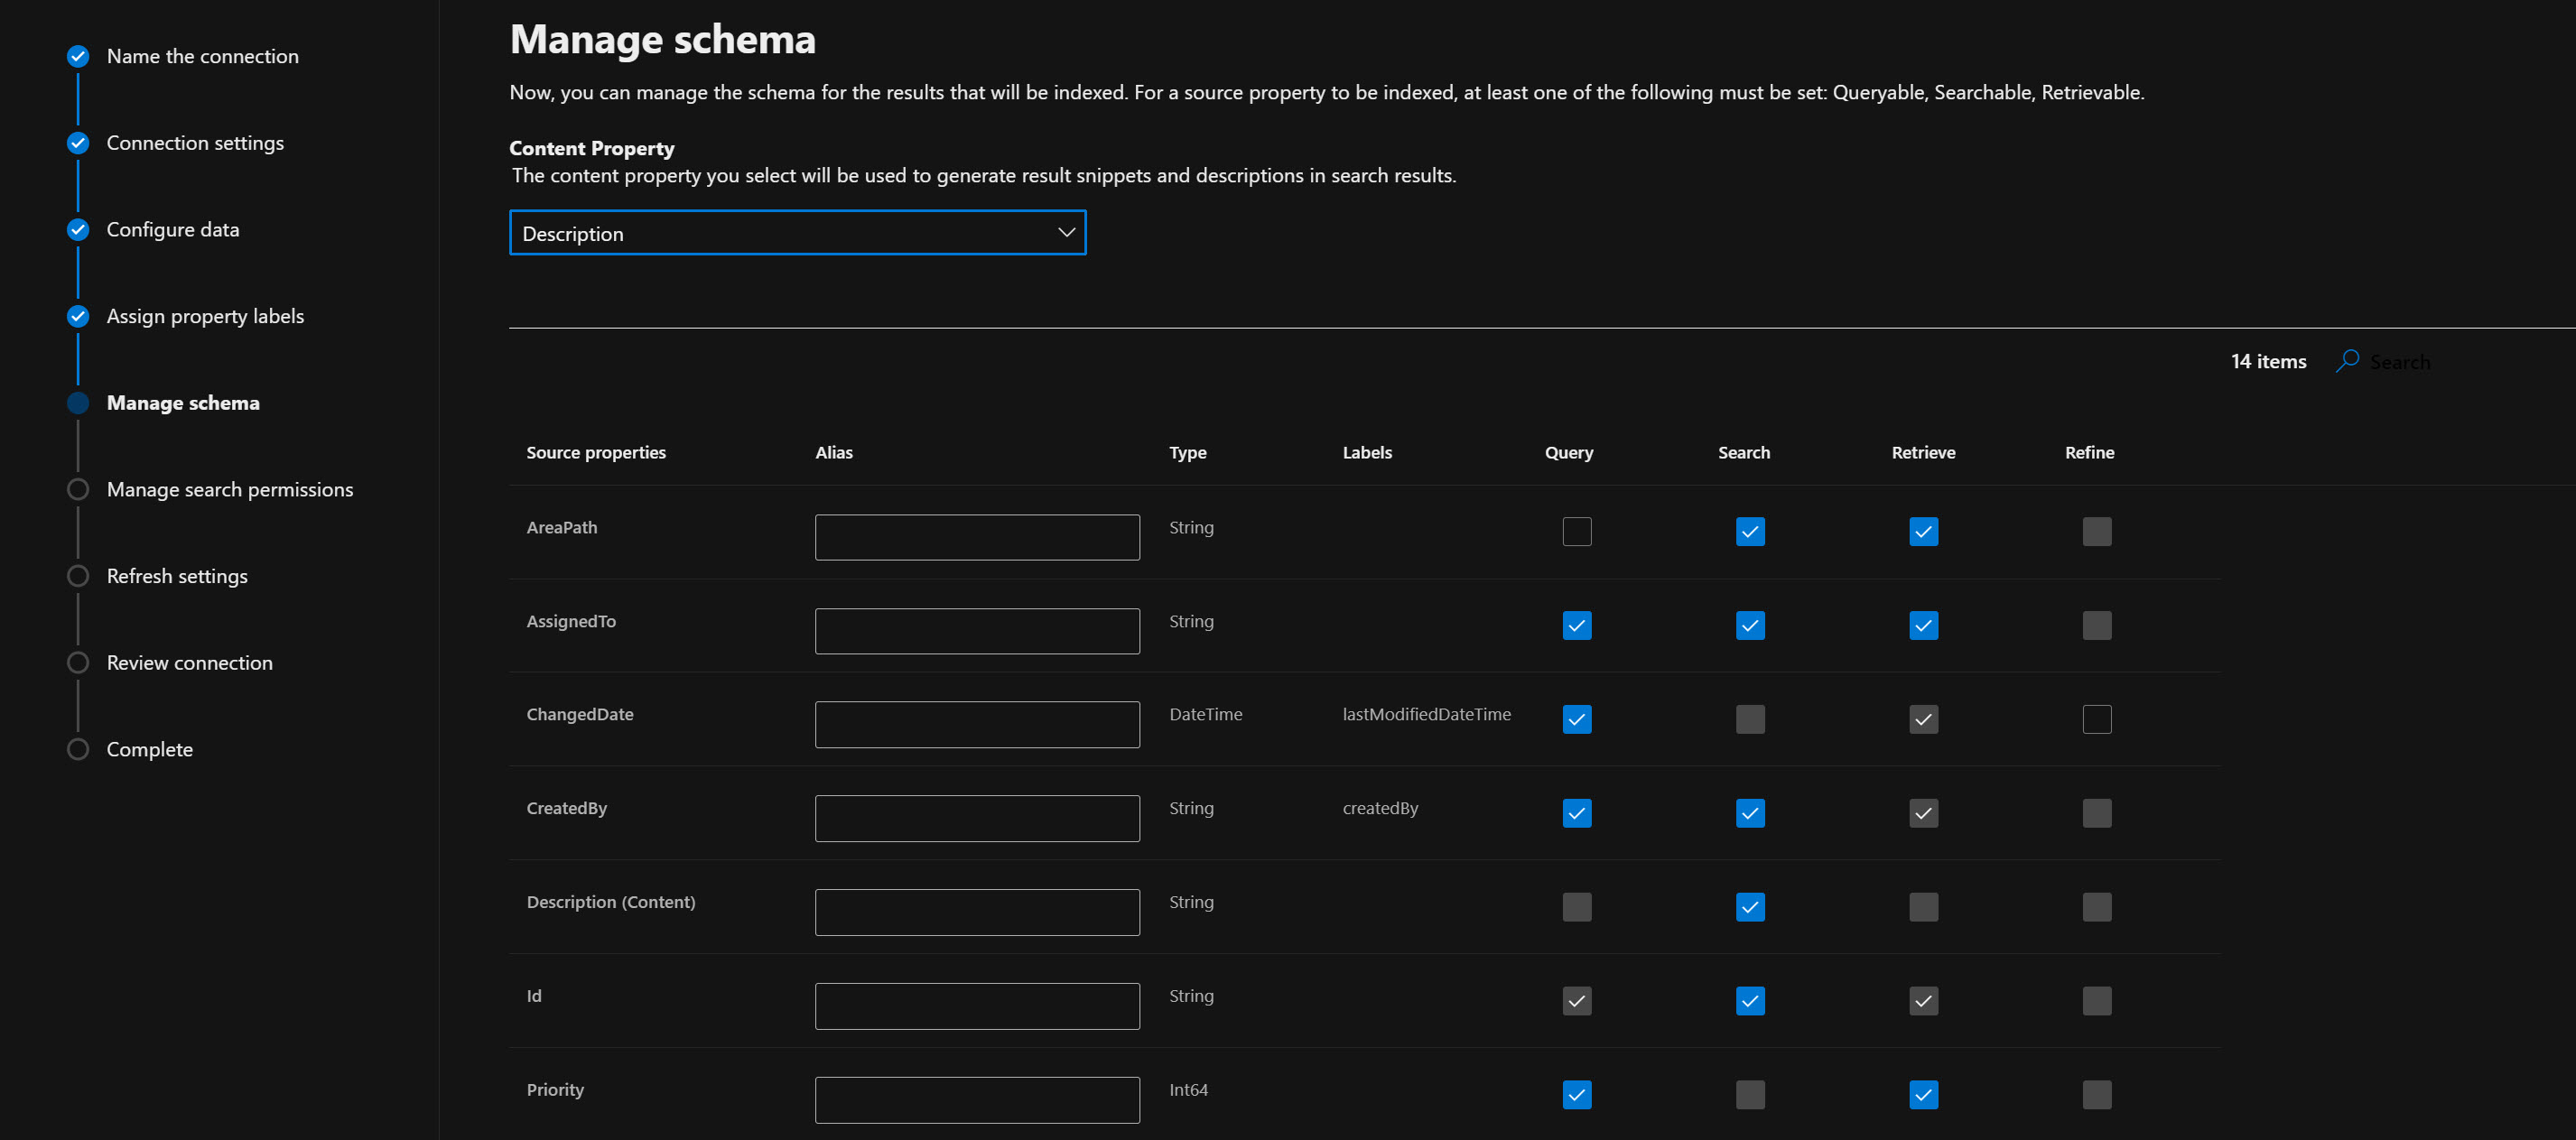
You can also choose to make a source property a refiner, in the example above the two (2) that are available are ChangedDate and Tags, the caveat with Tags is that the property cannot be both Searchable and Refinable. The schema cannot be edited after the fact so if you wish to edit this after you shall have to drop the connector and recreate it.
The next step is Manage search permissions, not much here to configure as you *must* select Everyone.
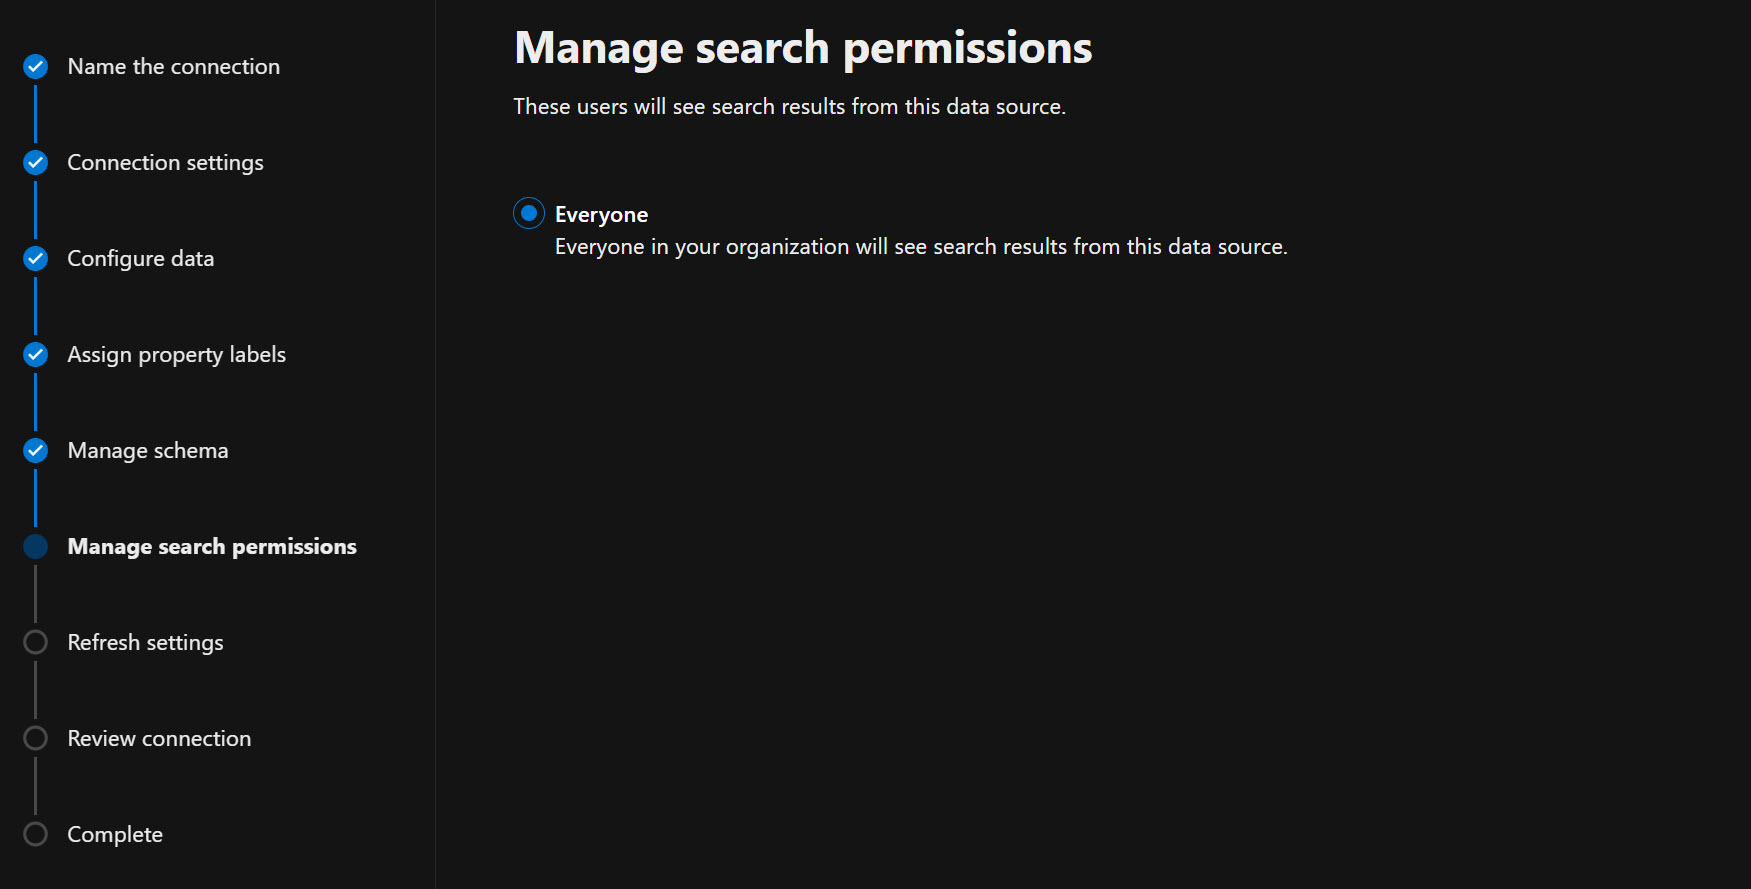
This does make sense from an information perspective but if you need to exclude Team Project(s) make sure you customize the search data accordingly.
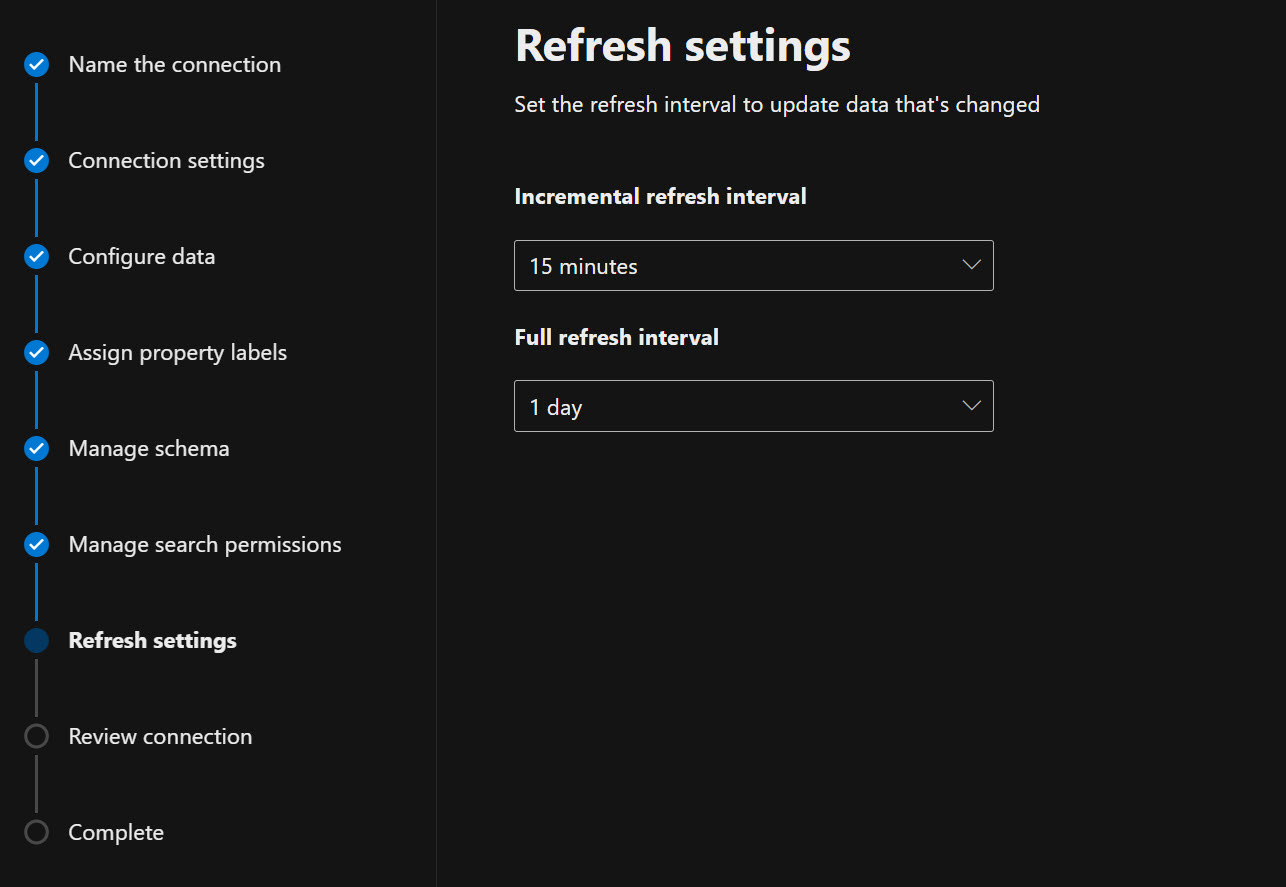
The next step is Refresh settings, the defaults should suffice for most however you can customize both the incremental and full refresh intervals if necessary.
Finally we’re able to review the connection settings we’ve chosen
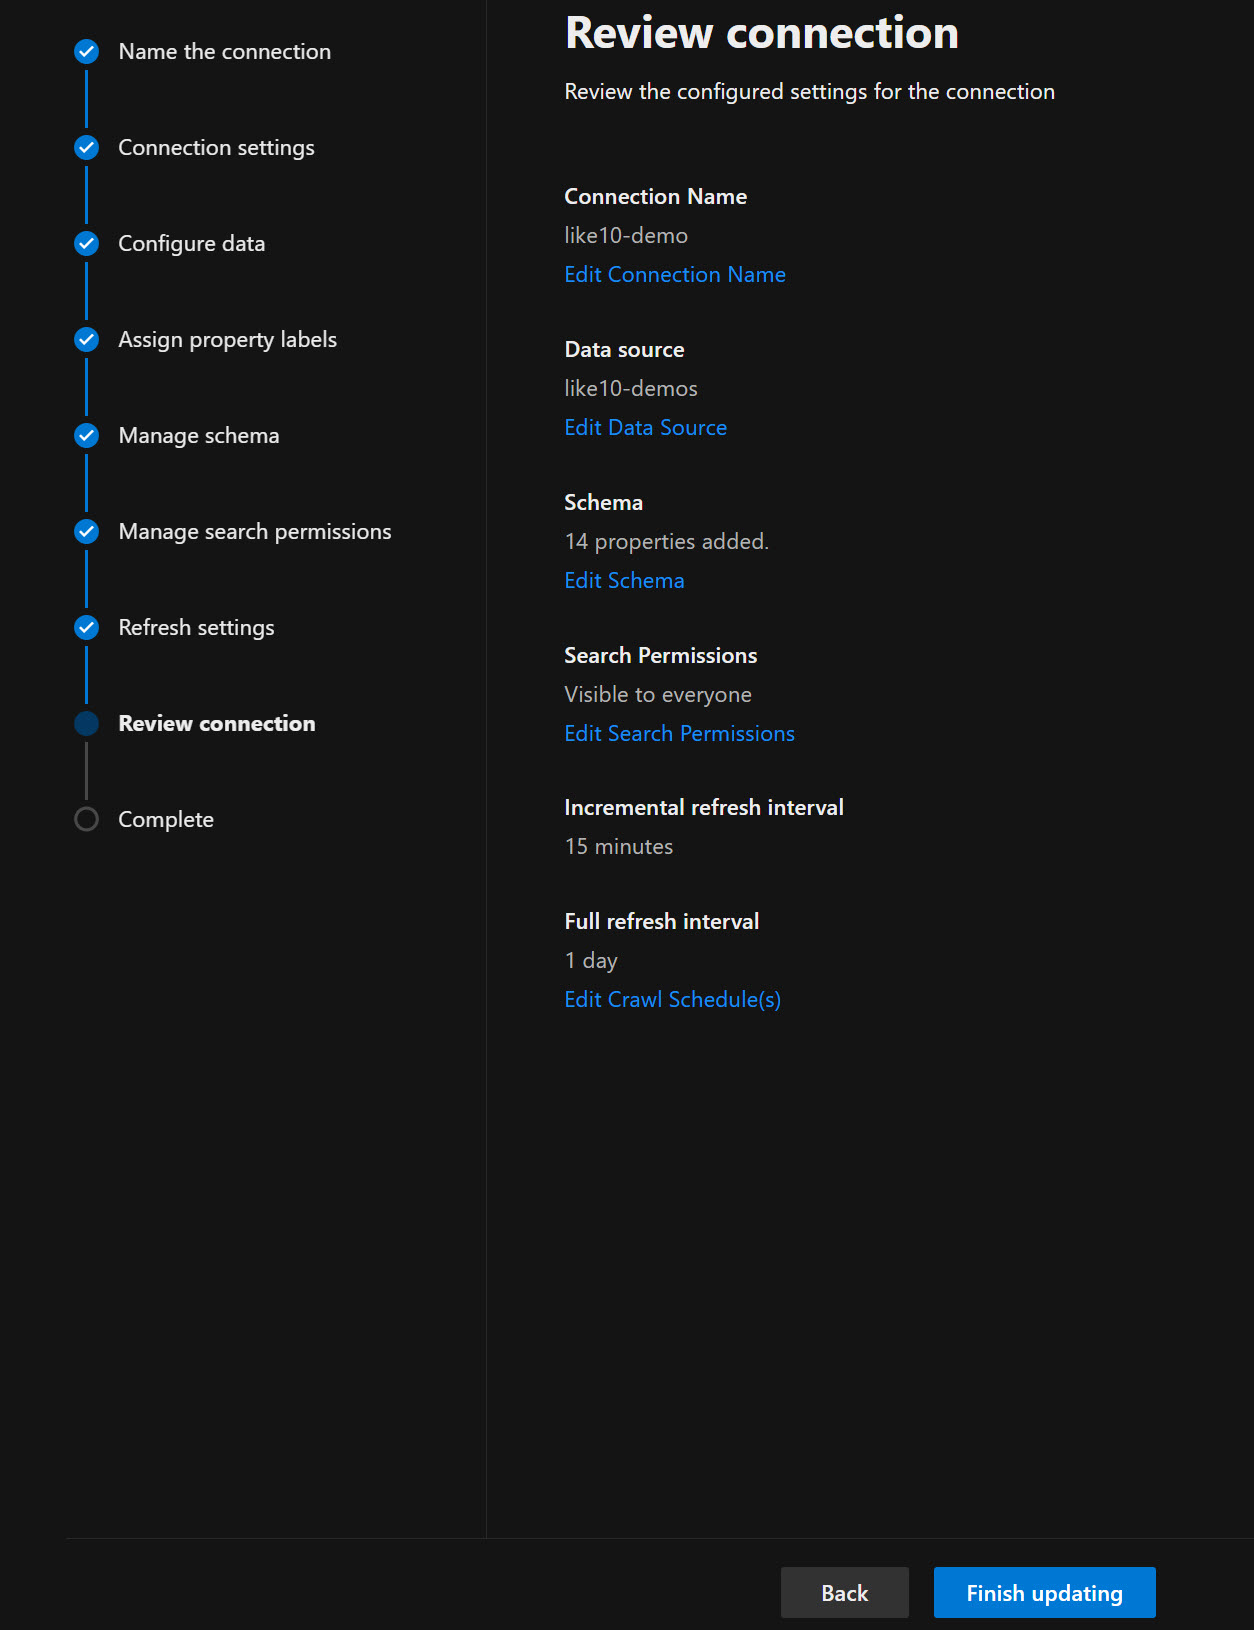
If you’re okay to proceed you can now click Finish updating to publish your connection, this will take a few minutes.
You should see the connector appear shortly like in my screenshot below, the screenshots above are for the like10-demo entry you see below. You will also note that a required action Create Vertical link is present in the last column, you will need to click this to create a named vertical in Bing for your Azure DevOps search results.

The Create Vertical wizard is pretty brief and half of the pages are optional, these pages are:
-Vertical name
-Select a content source: You can choose to select multiple connector sources. A connector can only be used in a single vertical.
-Add a query (optional): If you want to limit the scope for this vertical you can write a query using KQL
-Filters (optional): If you selected any Refiners when defining your schema you can add a filter here.
-Review
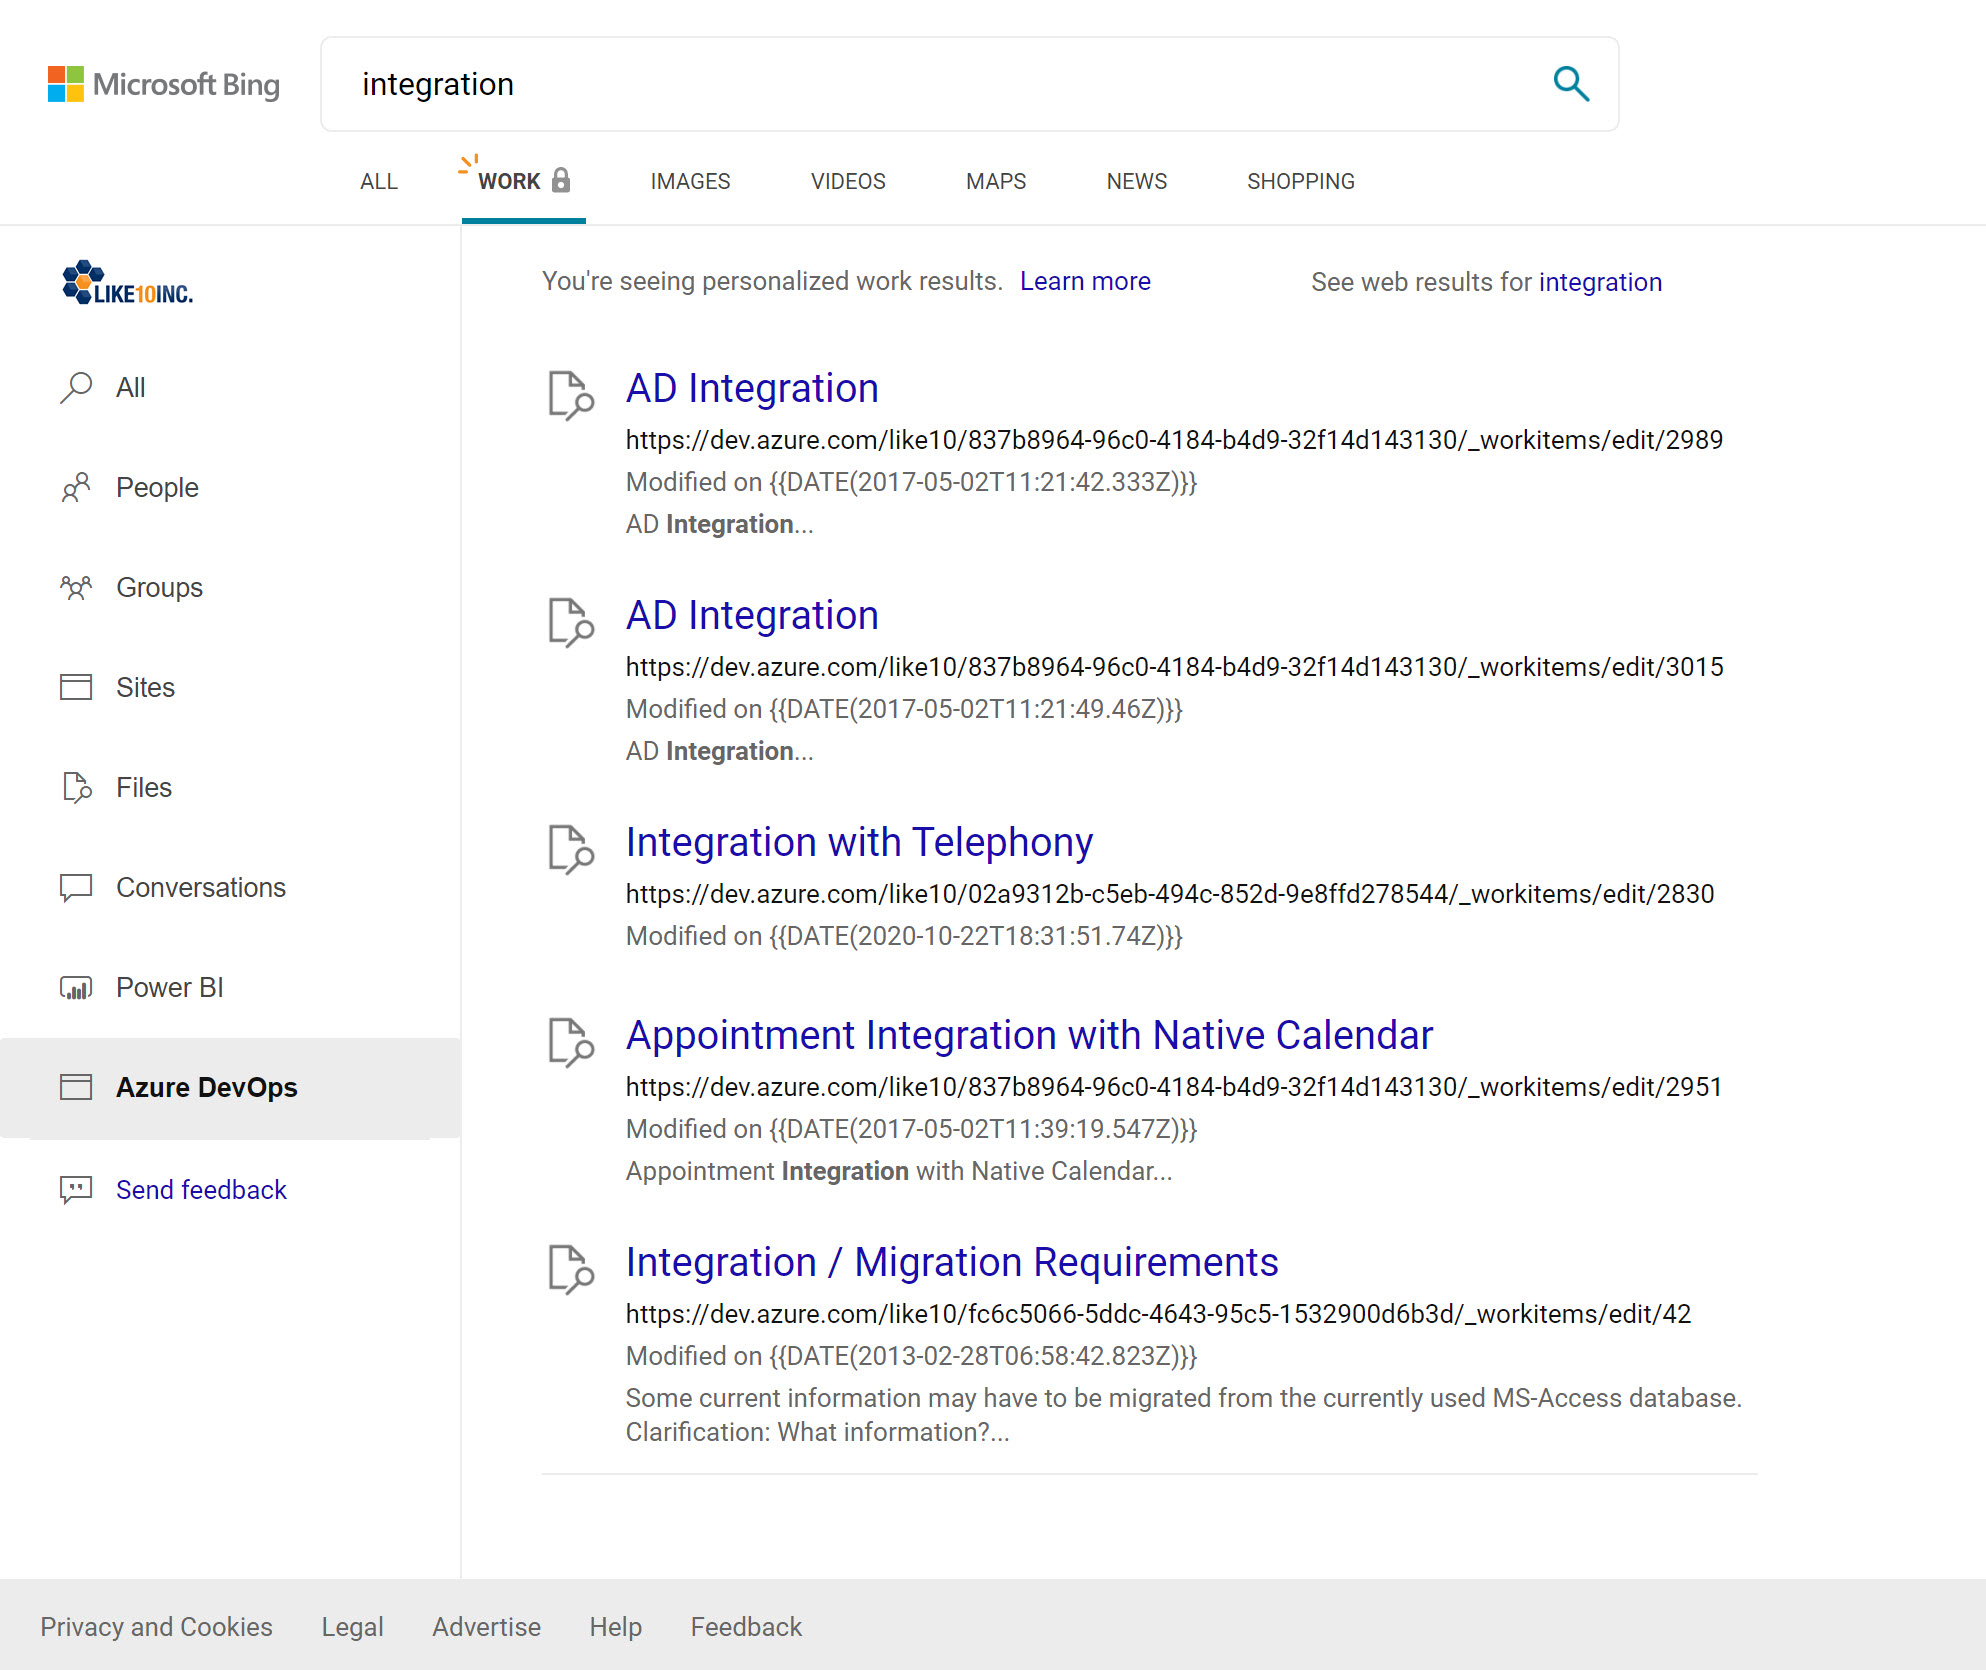
Once this is complete, you can head over to Bing and login with your work/school account and you will see the Vertical you added along with results. You are able to Enable or Disable your Verticals from the Customizations tab within Search & Intelligence.
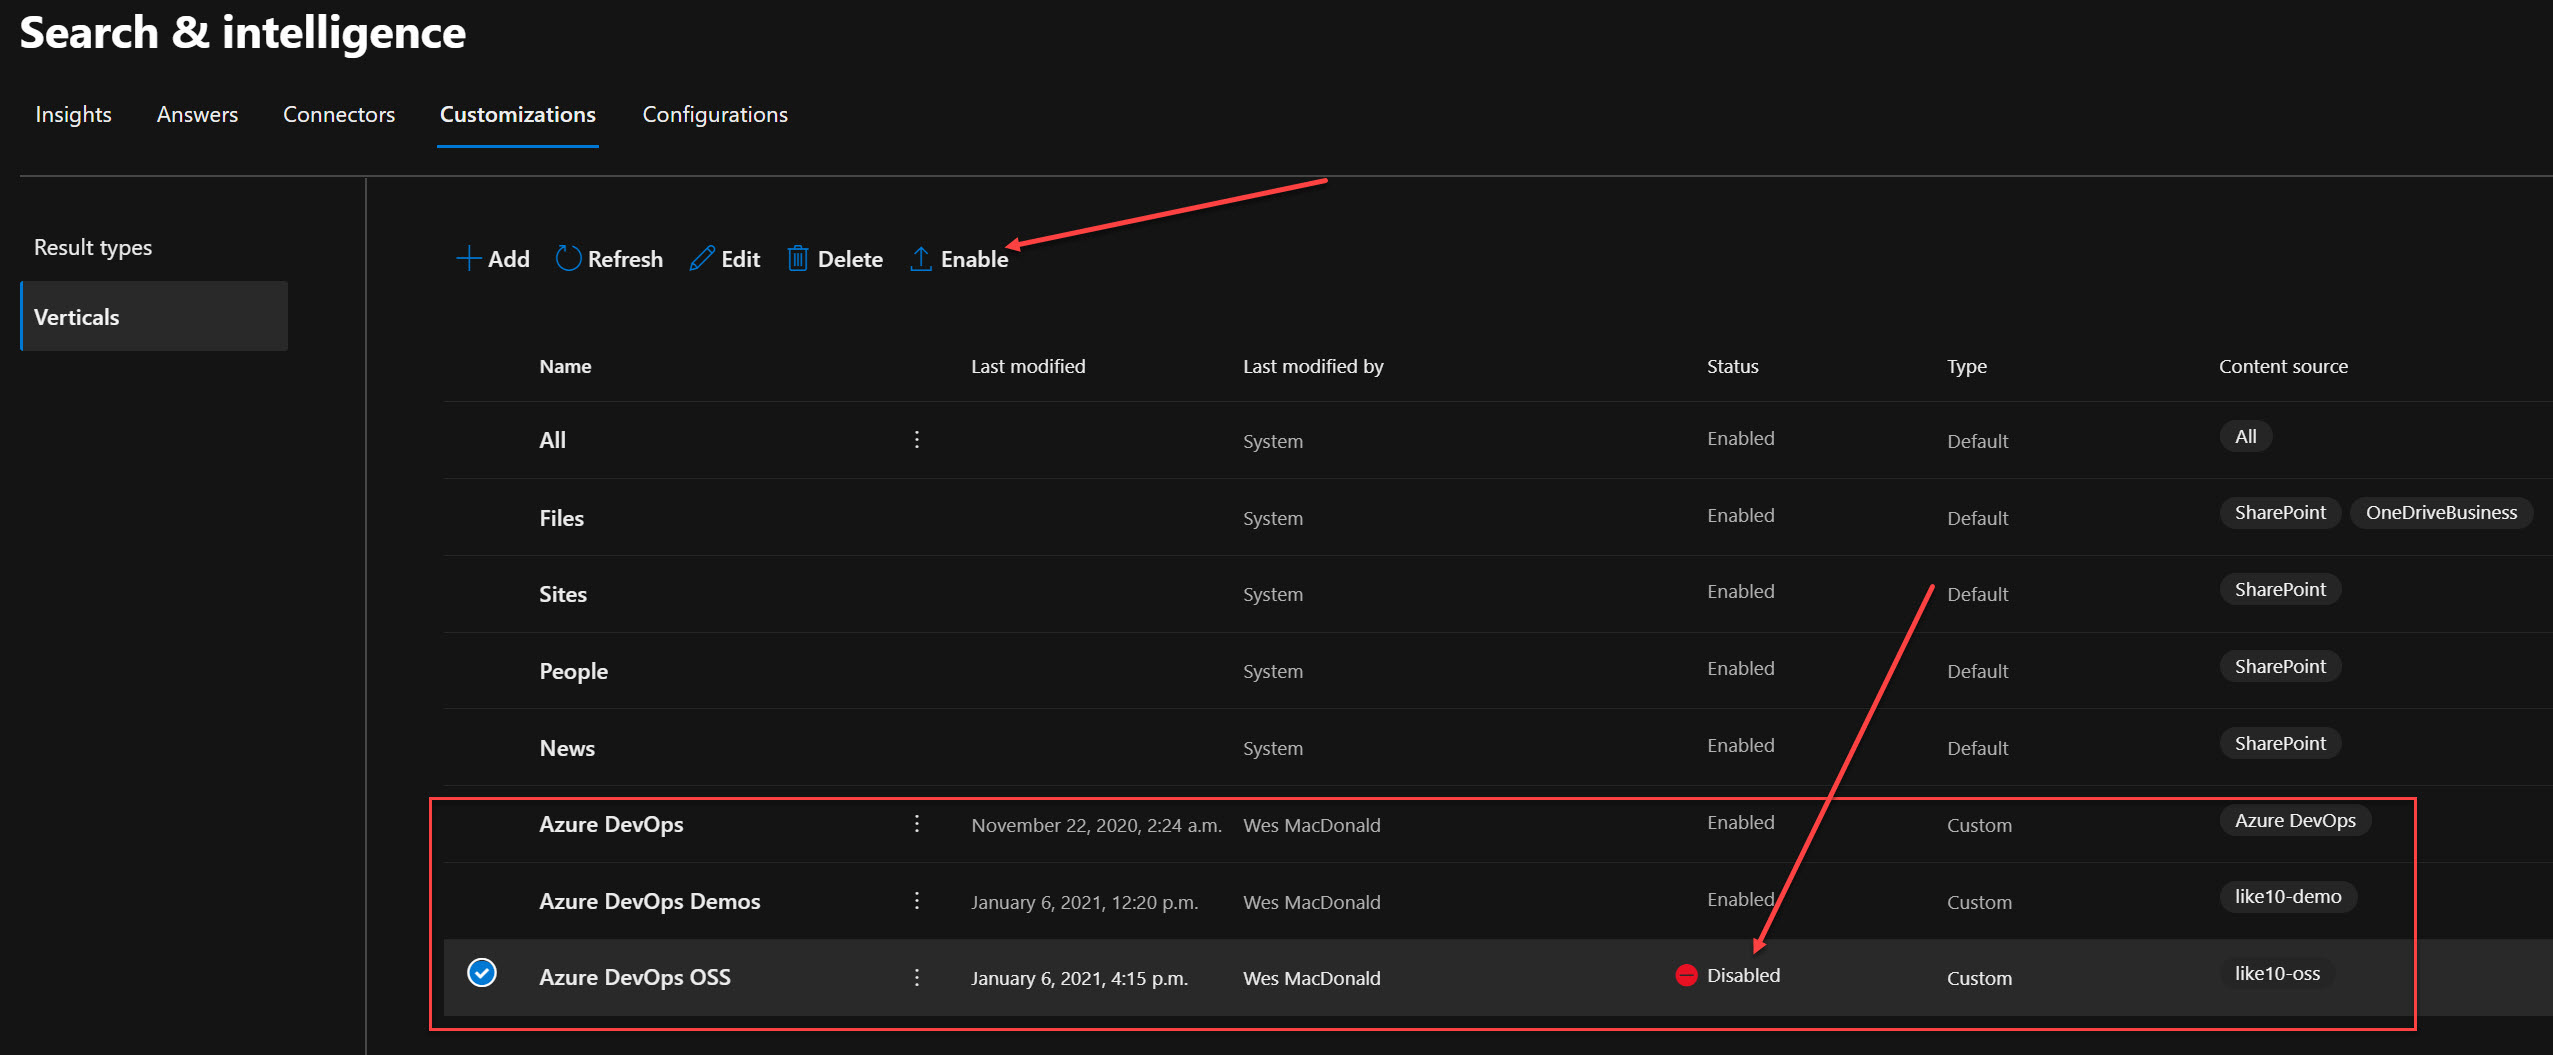
I could search for “As a customer” in Bing within my Azure DevOps vertical only to review the results.
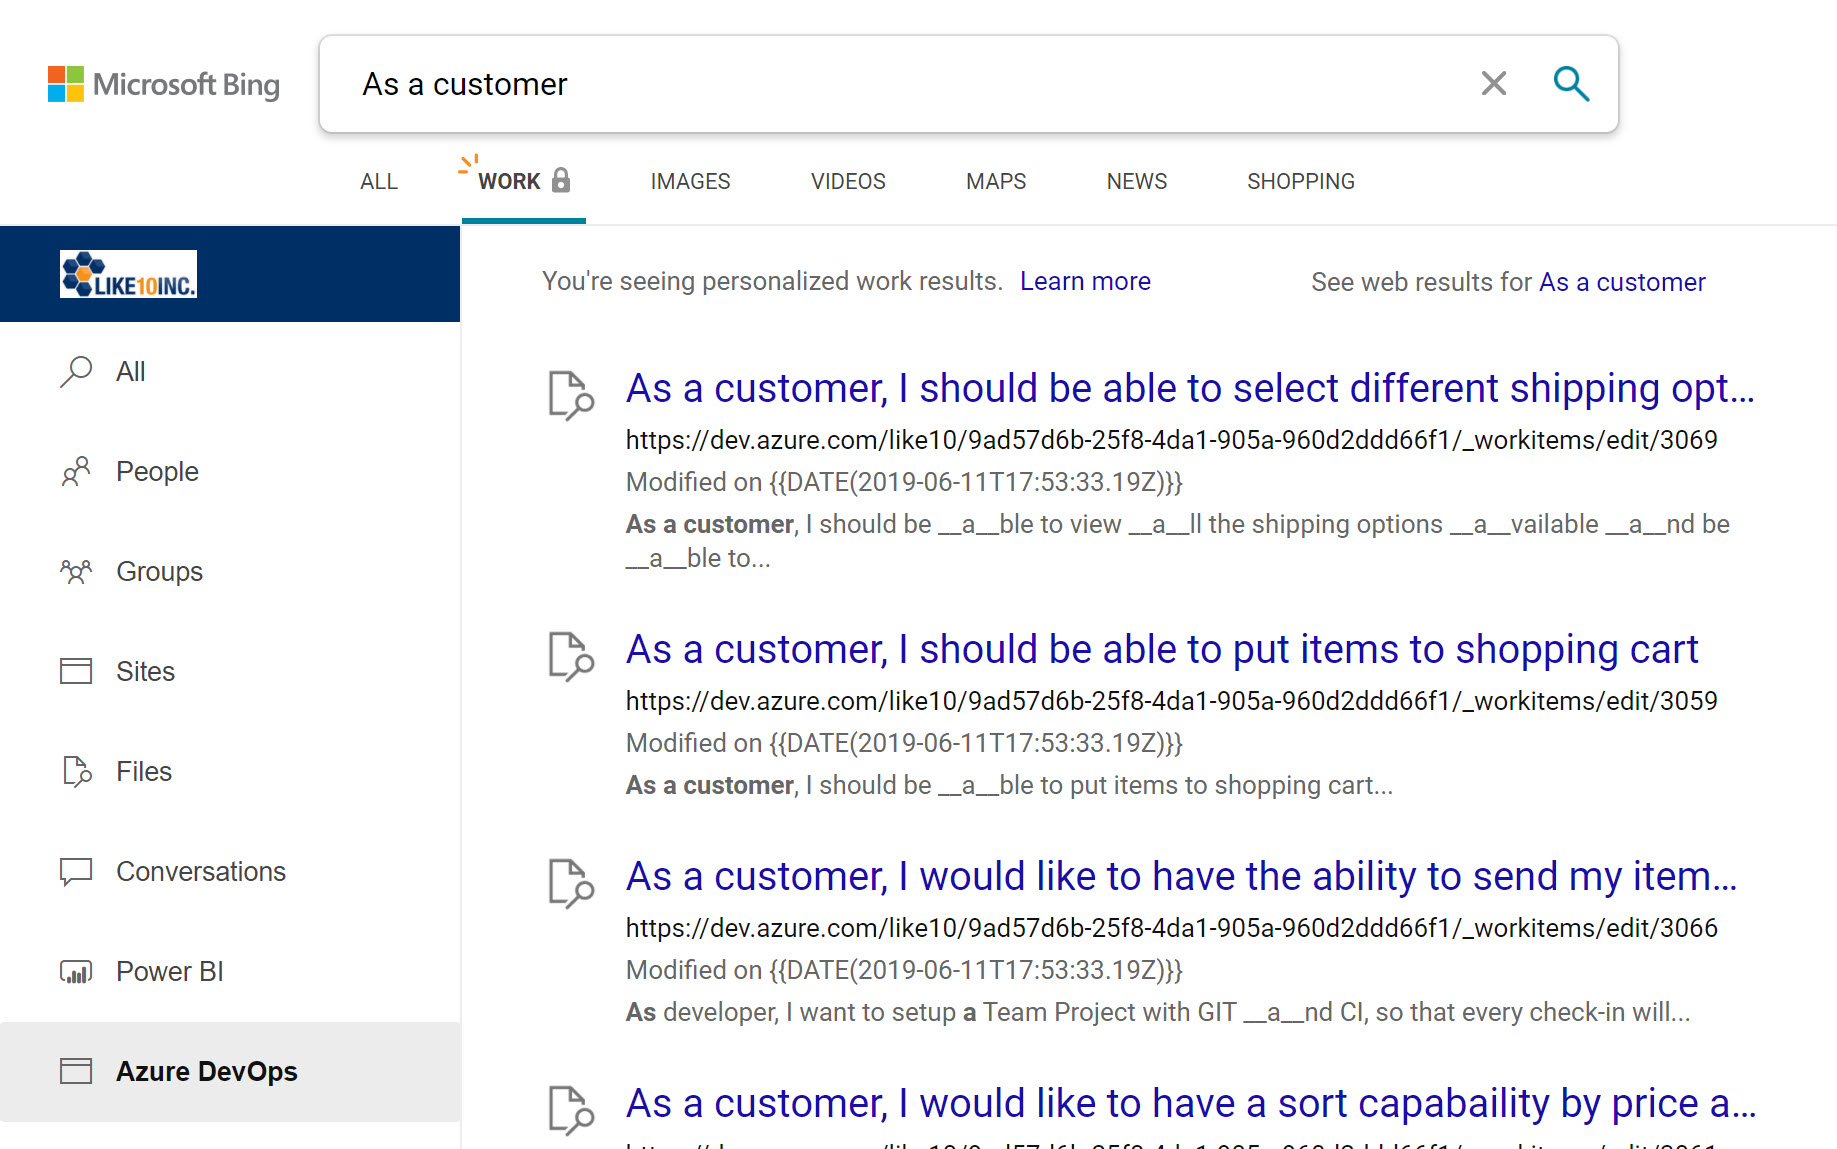
Definitely easy to implement, so what are you waiting for 🙂

Trackbacks/Pingbacks
[…] Integrate Azure DevOps work items into your work search results (Microsoft Bing)Wes shows us a handy trick for letting Bing (when property authenticated to) return results from your Azure DevOps organization. […]
LikeLike