
 January 7, 2014
Part 1
I know most of the readers here know that a build server was never meant to do deployments of your software. During the middle part of 2013 Microsoft acquired the InRelease business unit from InCycle Software, this software product has since been integrated into the Visual Studio 2013 family of products as we found out during the big launch in New York. If you’re looking for any of the content from the launch you can find it on SlideShare here. The Release Management integration is really cool and here’s a screen capture of it up and running in my test environment, this blog post will start to go through the steps involved integrating it with your TFS 2013 server 🙂

Release Management | Releases
What you may not know is you probably already own it and depending on your Visual Studio w/MSDN subscription you may have some additional licenses you weren’t aware of. Release Management consists of three (3) different software components:
- Release Management Client for Visual Studio 2013
- Release Management Server for Team Foundation Server 2013
- Microsoft Deployment Agent (licensed separately for each target server)

Products by MSDN benefit level
If you or your organization have licensed any of the following: Visual Studio Ultimate with MSDN, Visual Studio Premium with MSDN, Visual Studio Test Professional with MSDN, or MSDN Platforms then those users who are assigned those licenses are entitled to access the Release Management Client. If you or your organization have licensed any of the following: Visual Studio Ultimate with MSDN, Visual Studio Premium with MSDN, or Visual Studio Test Professional with MSDN then you are entitled to use the Release Management Server. If you or your organization have licensed Visual Studio Ultimate with MSDN then for each of those you receive a complimentary grant of one license of Visual Studio Deployment Standard 2013 (Processor-based license with each license covering two physical processors and up to two endpoints (virtual machines) per license on either private or public cloud).
Disclaimer: I am not a Microsoft licensing expert and based the above paragraph on the following references, please check with your Microsoft representative:
You can find the software either on on the MSDN downloads or Visual Studio downloads page (shown pictured below), clicking on either one will bring you to the appropriate page.

Release Management for Visual Studio 2013 Media (MSDN)
")
Release Management for Visual Studio 2013 Media (VisualStudio.com)
To get started you’ll need the following:
- Release Management (RM) software (server, client and agent), the ISO on MSDN has all of these together
- Installation Guide
- SMTP Server Address
- Web Services Port (default is 1000)
- Domain Accounts to required run each of the services (server and agent) and connect to TFS (on-premises) from RM
- contoso\inrConnect
- contoso\inrDeployer
- contoso\inrService
Please take the time to review the installation guide before you continue (it’s only 18 pages). I’ll walk through my configuration and an example release triggered by a build.
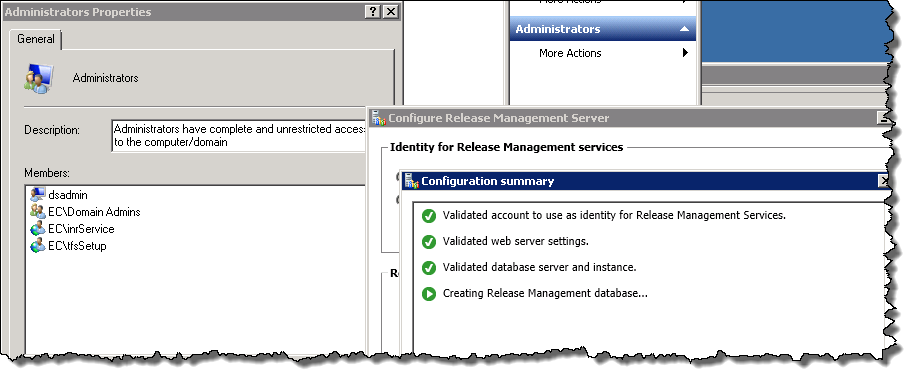
I used the TFS Setup account (contoso\tfsSetup) to perform the installation/configuration of the Release Management Server for two reasons:
- already a member of the Local Administrators on the TFS 2013 Application Tier
- already granted the sysadmin role on the Database Tier
Locate the rm_Server.exe in the Server folder on the ISO image and run it and install the files on the Application Tier (rebooting if necessary)

Release Management – rm_Server.exe
Once it is installed we can go ahead and configure the Release Management Server. For this portion of the configuration I am going to use the contoso\inrService account as the application pool account (NOTE: the contoso\inrService account must be a member of the Local Administrators group or the configuration will fail)
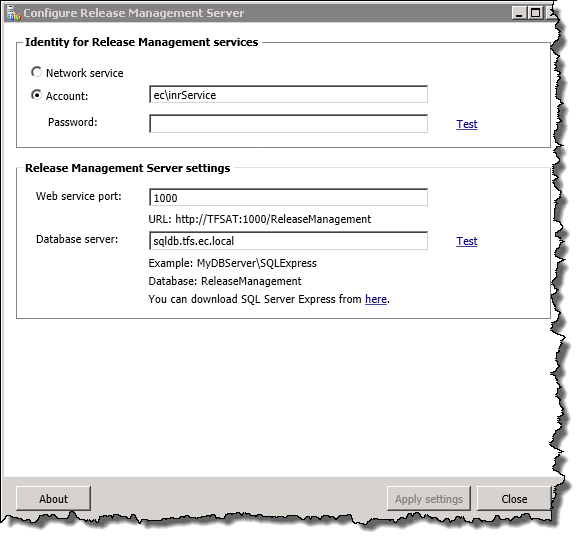
Configure Release Management Server
I am using the same database server for RM that I use for TFS (already happen to have an alias configured). Once done click Apply Settings and wait for the configuration to be applied.
Release Management | Apply Settings
The next step is to install the Release Management Client software to enable us to connect the Release Management service to our Team Foundation Server service. Locate the rm_Client.exe in the Client folder on the ISO image and run it and install the files on the Application Tier.

Release Management – rm_Client.exe
After the installation is complete click Launch. Running the client for the first time you will be presented with a dialog to configure the address of the Release Management Service.
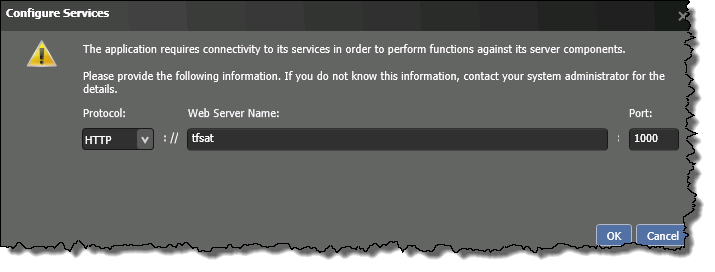
Release Management Client | Configure Services
Press OK to continue (you will be prompted to run as Administrator to save the configuration). Once the Release Management Client launches navigate to the Administration tab and then click on the Manage TFS link.

Release Management Client | Administration | Manage TFS
Before we go further we need to grant permissions to the account we’re planning on using to connect to TFS (contoso\inrConnect). Launch a browser window and navigate to the following page to administer the security on your Team Project Collection. Type in the following URL: http://%5Btfs-server-name%5D:8080/tfs/_admin and select the collection you want to connect to Release Management.

TFS 2013 Administration
In my case my collection is named DefaultCollection and then I’ll click on Manage collection security and group membership.

Manage collection security and group membership
- Click on Project Collection Administrators (left)
- Click on Members (right)
- Click Add
- Click Add Windows User or Group
- Type the domain\username of the user which in this example is contoso\inrConnect
- Click Save Changes
Let’s continue configuring Release Management now that we’ve got a user with the right permissions. Go back to the Release Management Client | Administration | Manage TFS screen and click New

Administration | Manage TFS | TFS Connection
Enter the following values for your TFS environment:
- Name or URL of the TFS: tfs.ec.local
- Project Collection Name: defaultcollection
- Connect Details: (default values should suffice for most installations)
- Connect As | Account Name: contoso\inrConnect
- Connect As | Password: xxxxxxxxx
You should at this point be able to click the Verify link in the lower right.
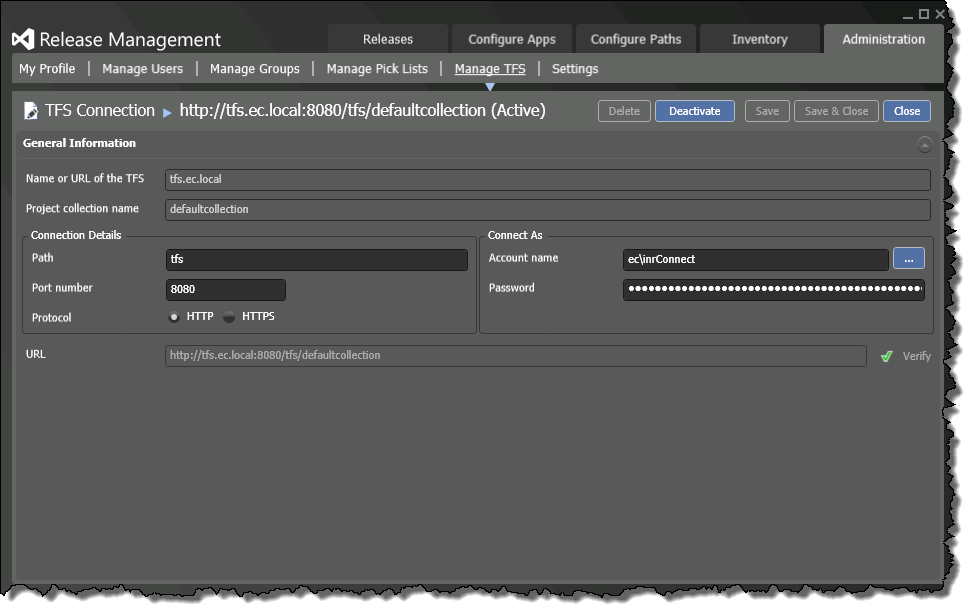
TFS Connection | Verify
Click Save & Close.
Let’s install the Microsoft Deployment Agent in our DEV environment, which for the purposes of this blog post is a single machine. Locate the rm_DeploymentMsdn.exe in the Deployment folder on the ISO image and run it and install the files on the server (rebooting if necessary).

RM_DeploymentMsdn.exe
Once it is installed we can go ahead and configure the Deployment Agent. For this portion of the configuration I am going to use the contoso\inrDeploy account as the service account (NOTE: the contoso\inrDeployer account must be a member of the Local Administrators group or have required permissions to install applications locally).
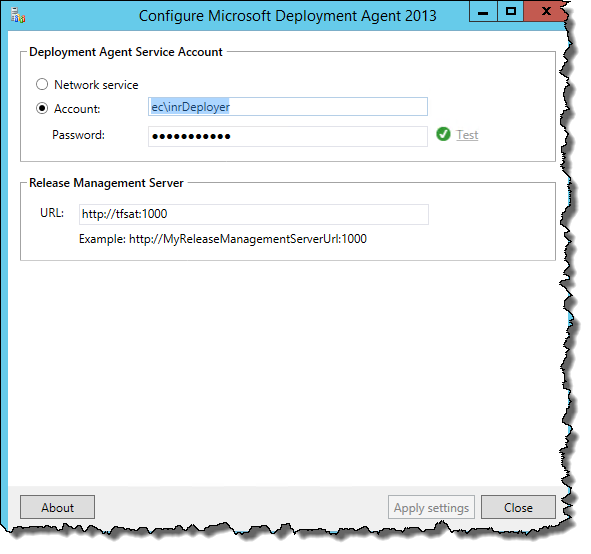
Configure Microsoft Deployment Agent 2013
Enter in the Deployment Agent Service Account information (click Test to verify the username and password) and the URL to the Release Management Server and click Apply Settings.
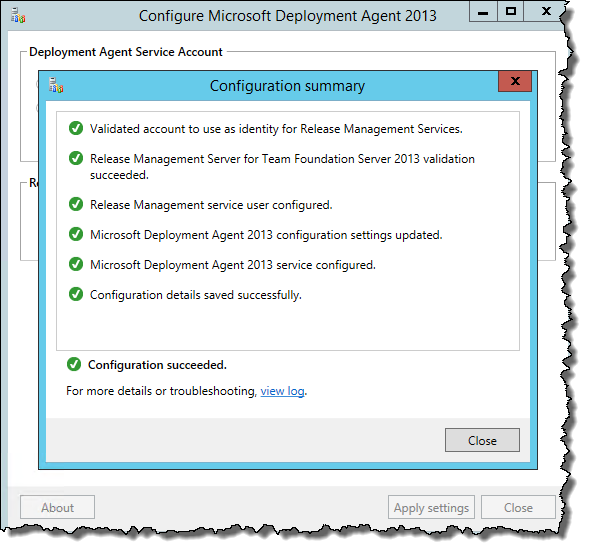
Configure Microsoft Deployment Agent 2013 | Apply Settings
Click Close and Click Close again. We shall now configure the contoso\inrDeployer as a Service User in the Release Management Client, navigate to Administration | Manage Users | New
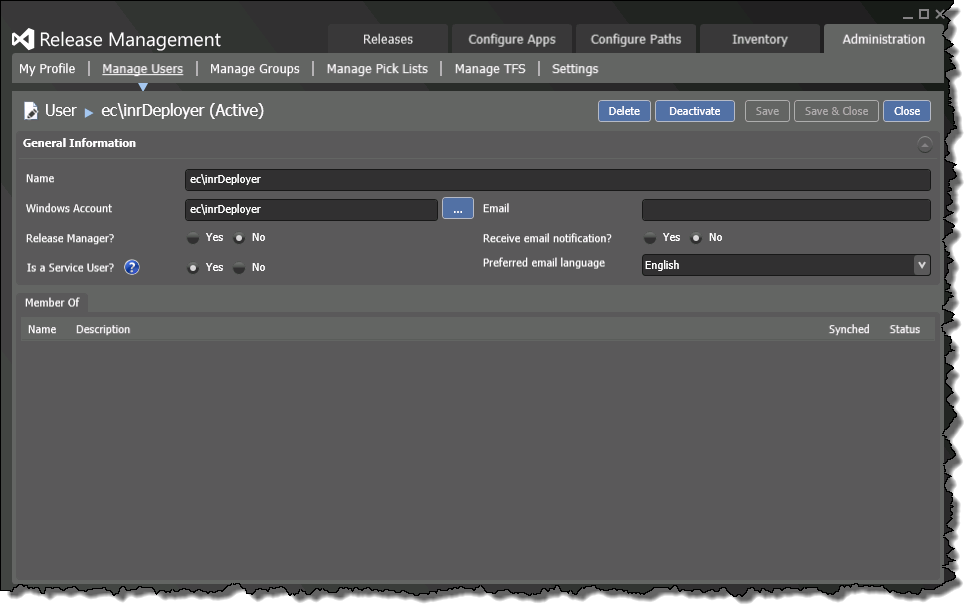
Administration | Manage Users
- Name: contoso\inrDeployer
- Windows Account: contoso\inrDeployer
- Release Manager: No
- Is a Service User: Yes
Click Save & Close. Let’s go and find those Deployment Agents to see if Release Management can see them! Navigate to Configure Paths | Servers
- Locate the New button and click the down arrow
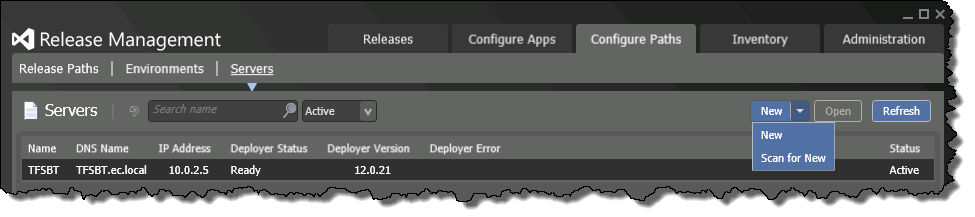
Configure Paths | Servers | Scan for New
- Click Scan for New

Unregistered Servers
A list of the unregistered server should be displayed, in my case I installed the Microsoft Deployment Agent on two different servers which are shown above. Click on the Display Name of a server and click Register or Register & Close if you’ve selected the last unregistered server.


- Registered Servers
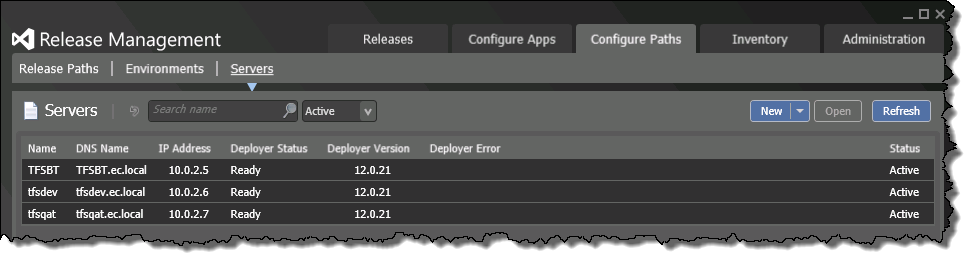
You should see the server listed now under the Servers screen. Click on Refresh to clear the message Deployment Agent has not communicated with the Release Management Server. Now that we’ve got that all working let’s configure a release in Release Management for a build definition….
Stay tuned for the next part of the post!

Excellent introduction to release management server. I currently use a combination of Web Deploy and TFS custom build templates (custom WWF) as a release management system. Requires a high level of support. Looking forward next post.
LikeLike