
 December 30, 2013
I am recommending the use of a Windows Azure Virtual Network for this exercise so the virtual machine does not have any ports open to the internet (public facing). If you have any questions, comments or concerns regarding the steps in the article feel free to leave a comment.
Steps we’ll be performing in this article:
- Download the VS 2013 ALM Virtual Machine (.rar)
- Extract the files for the VS 2013 ALM Virtual Machine
- Download and install the Windows Azure PowerShell cmdlets
- Create a Windows Azure Storage Container
- Create a Windows Azure Virtual Network with Point-to-Site Connectivity
- Upload the .VHD to Azure Storage
- Configure a disk so the .VHD can be used by a Virtual Machine
- Create and configure the Virtual Machine
- Complete the configuration of the Virtual Network and connect to the VPN
First you should head over to Brian Keller’s great blog post and follow the instructions to get the files. If you don’t have a fast and reliable internet connection you may want to wait and build a 2nd virtual machine on the virtual network that I am configuring as part of this post to download the files and upload the .vhd to your Azure storage. I tried it this past weekend on my internet service (provided by cable) and the upload took just over 17 hours, if you do this from within a Virtual Machine in Azure the entire process (calculate MD5 Hash and Upload) takes about 2.5 hours.
Here is an example of the bandwidth available to you while performing the download from within a Windows Azure Virtual Machine. If you haven’t done this before follow this tutorial to get you started
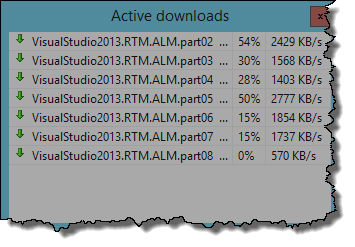
VS 2013 ALM VM Parts
I won’t go through the steps to extract the .vhd those are on the blog post. Let’s install the necessary software on our machine to upload the .vhd to our Azure storage container. If you navigate to WindowsAzure.com you can download the Windows Azure PowerShell. This will install the Microsoft Web Platform Installer and automatically select the Windows PowerShell cmdlets for Azure, when the dialog displays click Install.
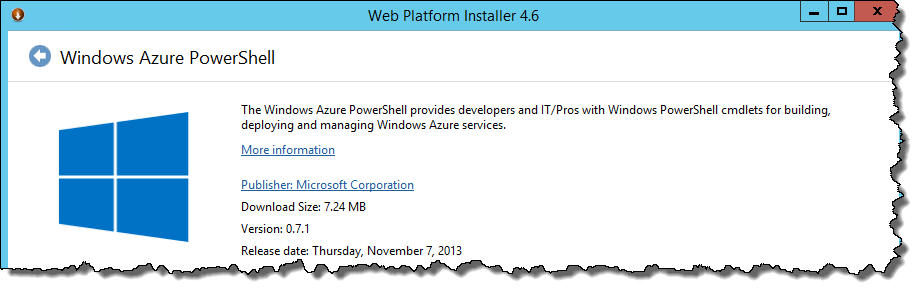
Windows Azure PowerShell Installer
On the Prerequisites dialog click I Accept to continue with the installation of the tools. This could take a few minutes as it installs quite a few dependencies so be patient, you can extract the virtual machine while you wait. After the PowerShell cmdlets are installed you can exit the Web Platform Installer.
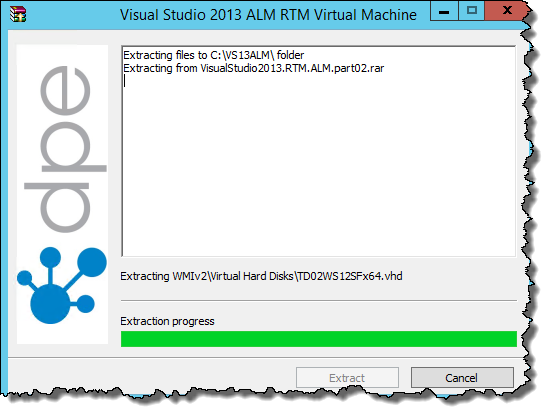
Extract the files for the VS 2013 ALM virtual machine
While we’re waiting for all that to finish let’s connect to Windows Azure and create the Virtual Network.
Provision Virtual Network
Launch your browser navigate to the Windows Azure Management Portal, after you’ve signed in click Networks on the left side of the page (you may need to scroll down).
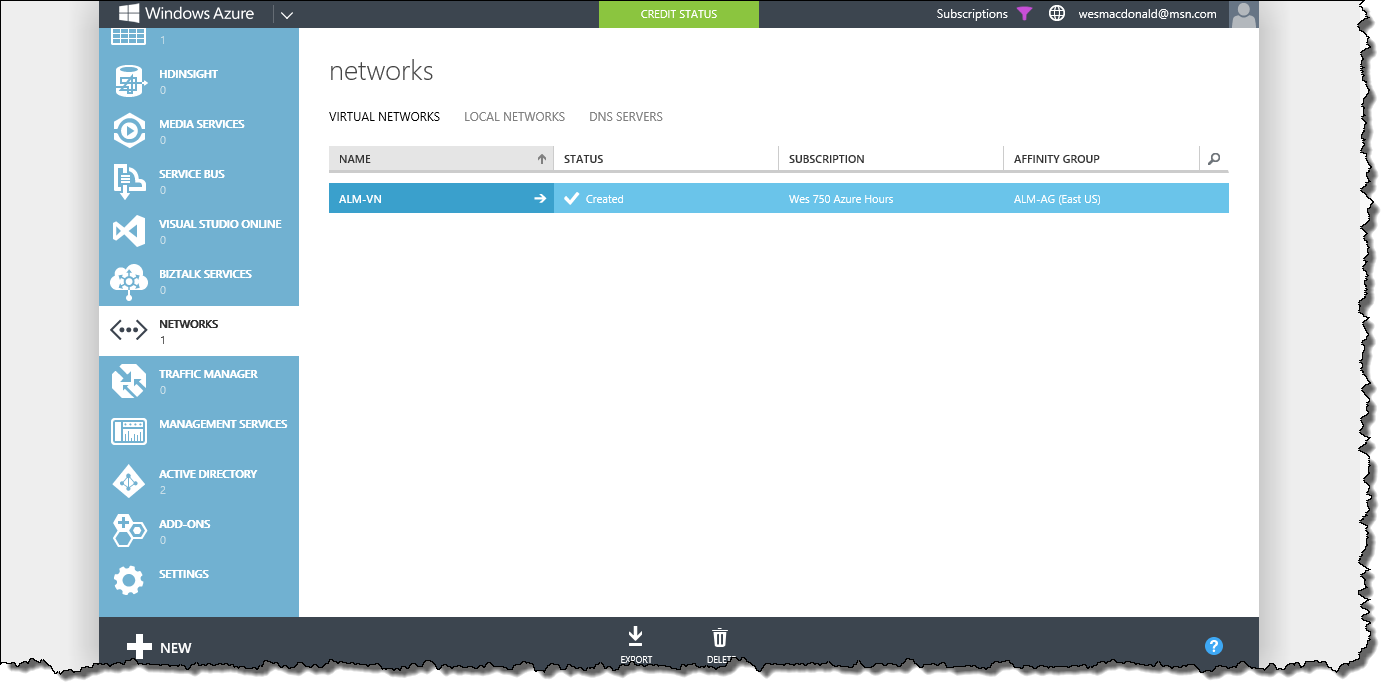
Windows Azure Virtual Network
- Click New in the bottom left
- Click Custom Create to Launch the Create a Virtual Network Wizard
- On the Virtual Network Details page enter the following information
- Enter a name for the virtual network: ALM-VN
- Choose a region: East US
- Choose an Affinity Group: Create a new affinity group
- Enter an Affinity Group Name: ALM-AG
- Click Next
- On the DNS Servers and VPN Connectivity page perform the following action
- Select the Configure point-to-site VPN check box
- Click Next
- On the Point-to-Site Connectivity (preview) page
- Accept the default values supplied
- Click Next
- On the Virtual Network Address Spaces page perform the following action
- Accept the default values provided
- Click add gateway subnet
- Accept the default values provided
- Click Complete
Wait for your virtual network to be provisioned…Let’s continue by provisioning some Azure Storage for the .vhd.
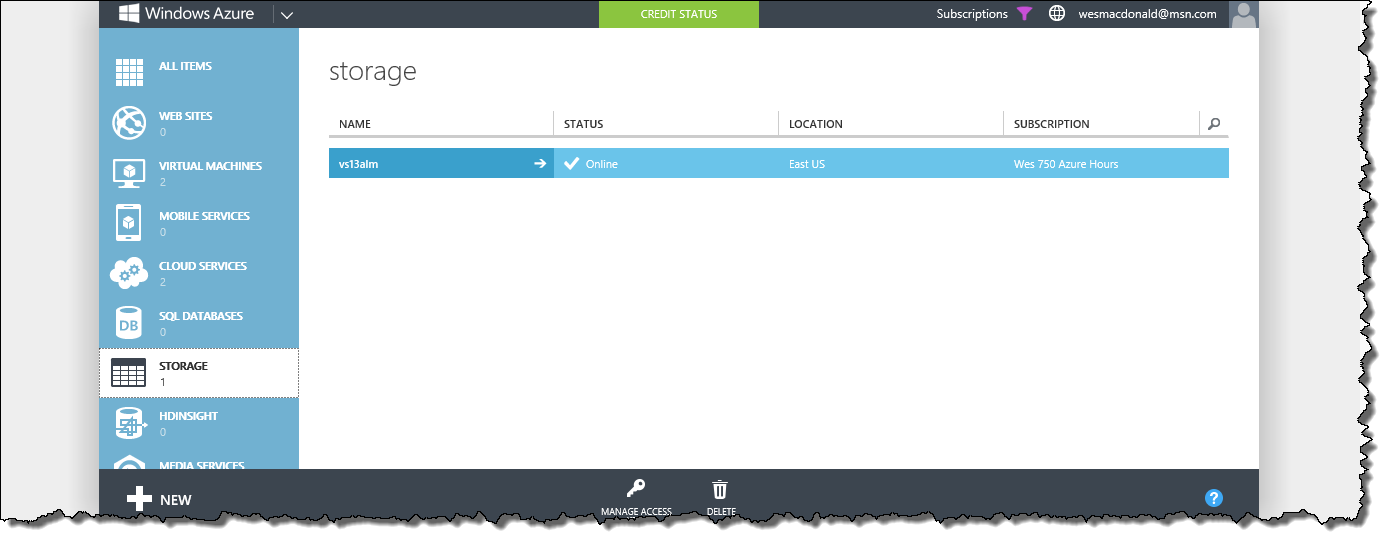
Provision Windows Azure Storage
Create a storage container to upload the virtual hard disk into. Launch your browser navigate to the Windows Azure Management Portal, after you’ve signed in click Storage on the left side of the page.
Windows Azure Management Portal – Storage
Click New on the bottom left hand-side of the screen
Quick Create is already selected
In the URL field enter a name for the storage: ALM-STO
In the Location/Affinity Group drop down select the Affinity Group you created earlier: ALM-AG
Click Create Storage Account
Wait for your Storage to be provisioned.
Once your Storage has been provisioned click on the name of your storage and you will be presented with a Quick Start page
Click the Containers link in the top menu
Click Add
Enter a Name for the container: vhds
In the Access drop down select Private
Click OK
Upload .vhd to Azure
Now we’re ready to start uploading the .vhd to our Azure Storage Container
Launch a Windows Azure PowerShell Command Prompt as Administrator and execute the following commands:
Get-AzurePublishSettingsFile
Note: Save the file to a known location, if a file is not downloaded by executing that command just navigate here to download your Windows Azure Publish Settings.
Import-AzurePublishSettingsFile “C:\VS13ALM\WMIv2\Virtual Hard Disks\latest.publishsettings”
Note: Replace the file name and path as appropriate
Set-AzureSubscription –SubscriptionName “My Azure Subscription Name” -CurrentStorageAccount “vs13alm”
Note: Set the Azure Subscription Name and Storage Account
Select-AzureSubscription –SubscriptionName “My Azure Subscription Name”
Note: Select the Azure Subscription
Upload .vhd to Azure
Using the URL for the storage container you created and the full path to the .vhd file on your local hard disk and enter the following PowerShell command:
Add-AzureVhd -Destination http://vs13alm.blob.core.windows.net/vhds/VS13WS12SFx64.vhd -LocalFilePath “C:\VS13ALM\WMIv2\Virtual Hard Disks\TD02WS12SFx64.vhd”
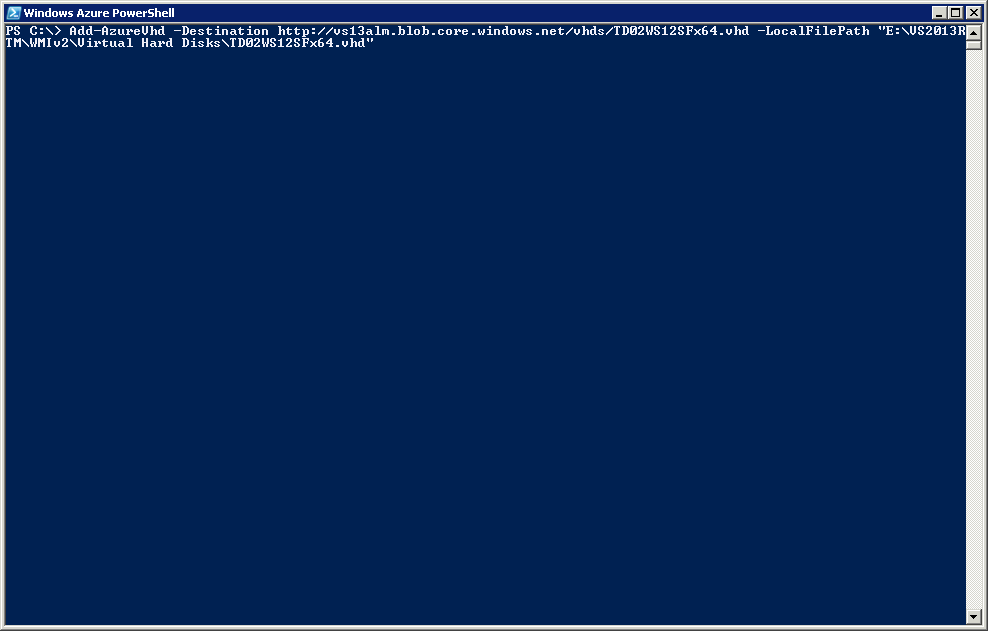
Add-AzureVhd
Here is the output from the Add-AzureVHD PowerShell command from the screenshot above:
MD5 hash is being calculated for the file  C:\VS13ALM\WMIv2\Virtual Hard Disks\TD02WS12SFx64.vhd.
MD5 hash calculation is completed.
Elapsed time for the operation: 01:22:44
Creating new page blob of size 56908317184...
Detecting the empty data blocks in the local file.
Detecting the empty data blocks completed.
Elapsed time for upload: 01:09:19

LocalFilePath                                               DestinationUri
-------------                                               --------------
C:\VS13ALM\WMIv2\Virtual Hard Disks\TD02WS12SFx64.vhd       http://vs13alm.blob.core.windows.net/vhds/VS13WS12SFx64.vhd
Configure Disk for Virtual Machine
Launch your browser navigate to the Windows Azure Management Portal, after you’ve signed in click Virtual Machines on the left side of the page.

Windows Azure Virtual Machines
On the top menu click DISKS
On the bottom menu click CREATE
In the Create a Disk from a VHD dialog enter the following:
Name: VS13ALMVHD
VHD Url: Browse to the .vhd you uploaded to the vhds Container
Select the check box: The VHD contains an operating system.
In the Operating System Family drop down select: Windows
Click OK
Once you see the name of your DISK listed click VIRTUAL MACHINE INSTANCES in the top menu
Click NEW
Click FROM GALLERY
On the left click MY DISKS
Select the disk named VS13ALMVHD and click NEXT
Enter a name and select a size for the virtual machine (I recommend Large or Extra Large) click NEXT
Cloud Service drop down select: Create a new cloud service
Cloud Service DNS Name: (Accept the default if it’s available)
Region/Affinity Group/Virtual Network: ALM-VN
Virtual Network Subnets: (Accept the default value)
Availability Set: (None)
Click NEXT
Delete the public ENDPOINTS NOTE: This will require you to connect via VPN to Windows Azure! If you
Click COMPLETE
Wait for your machine to be provisioned, it shouldn’t take more than a few minutes.
Complete the configuration of your Virtual Network
Follow the instructions here to complete the following tasks:
- Create a dynamic routing gateway
- Certificates
- VPN client configuration
Once you have verified your VPN connection is functional, you may start the virtual machine and RDP to the local address it is assigned. If you have any questions or if I’ve left something out please leave a comment.

Is there anyway to create a snapshot of the VM so it can be reset back to the original demo startup?
LikeLike
Hi,
Creating a snapshot through the Portal is not supported. You may want to take a look at this article Backup and Restore Windows Azure IaaS Virtual Machines using BLOB Snapshots. It contains PowerShell scripts to create a snapshot of the VM and restore a VM from a snapshot (deletes and recreates the virtual machine).
It’s not perfect but for this purpose may be sufficient 🙂
Wes
LikeLike
Hey Wes! Any chance of updating this for the new Azure portal? Well, likely creating a second post that rehashes these steps but using the new interface? I gave it a go on the new site, and couldn’t quite figure out how to do every step and had to keep going back to the old (current) Azure portal site.
LikeLike
Hi Angela,
That’s a great idea. I’ll give that a go over the next couple of days.
Cheers
LikeLike